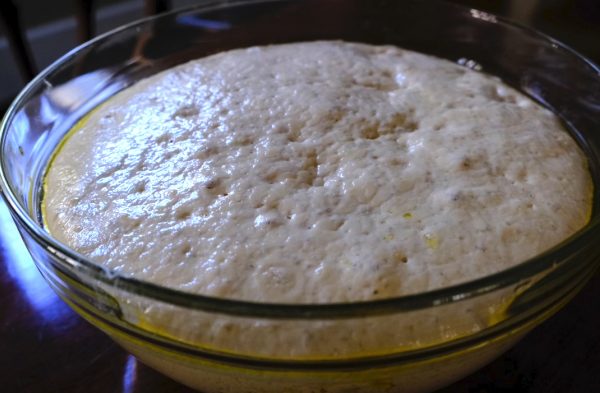
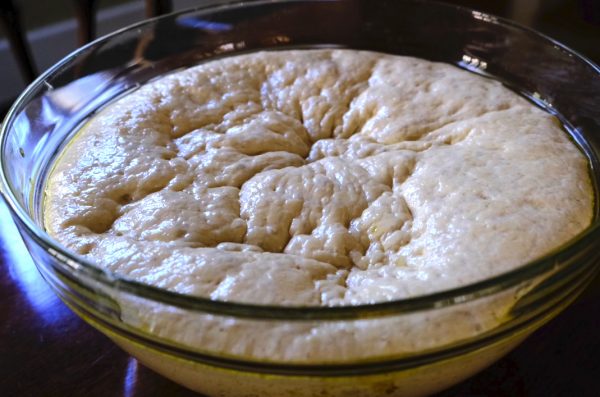
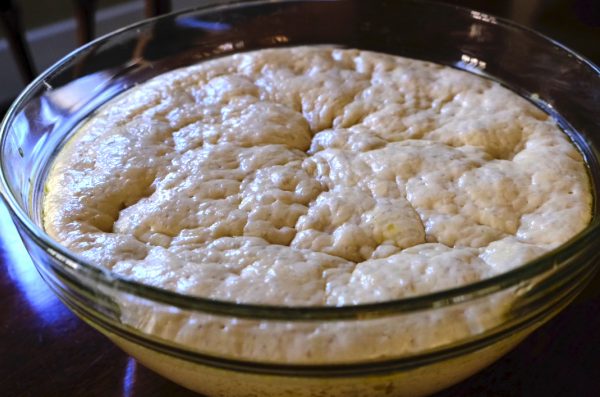
To develop properly, our high-hydration dough needs to rise for four hours on a warm countertop. During that time, it will rise, fall, and rise again.
My journey started at L’Antica Pizzeria da Michele in Naples. A visit to da Michele, first opened in 1870, is an act of pilgrimage, even appearing in “Eat, Pray, Love.” That meant a raggedy line extending well down the sidewalk. After 45 minutes, our family nabbed a small table near the mouth of the wood-fired oven.
I watched as the dough was spun-stretched into an impossibly thin round, draped onto a wooden peel, topped in seconds with tomato sauce and mozzarella di bufala, then slid into the back of the oven near a large mound of glowing coals. The pizza was constantly rotated and checked, and in 70 seconds the finished pie was pulled from the oven, sliced and served.
Foolishly, I thought that this demonstration was a form of divine guidance—someday I too would become a master pizzaiolo. Nope. Years followed of tough, too thin, tasteless and totally forgettable homemade pizzas. The one bright spot was my grilled pizza, which, for whatever reason, was notable. But the oven was still a no-fly zone for tomato pies.
Then last year, Milk Street’s editorial director, J.M. Hirsch, traveled to Bari, Italy (directly across from Naples on the Adriatic), to Panificio Fiore. Their focaccia was a revelation, and so was the recipe. The hydration level (the weight of the water divided by the weight of the flour) was over 90 percent, and the rising time was four hours, during which the dough rose, collapsed and rose again. It was not lost on me that the charm of this recipe, in addition to the outstanding crust and texture, was that the dough was simply poured into the pan—no da Michele expertise required.
Converting this recipe to a weeknight pizza, however, was another matter. The first issue was the amount of dough for the pan. When I split the recipe between two 12-inch round pizza pans, I got thick focaccia, not pizza: 20 percent less dough worked better. I also slightly reduced the hydration level from 95 percent to 89 percent for better chew and a bit less airiness but left the rising time at four hours plus.
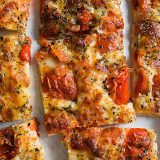
Pour-in-the-Pan Pizza with Tomatoes and Mozzarella
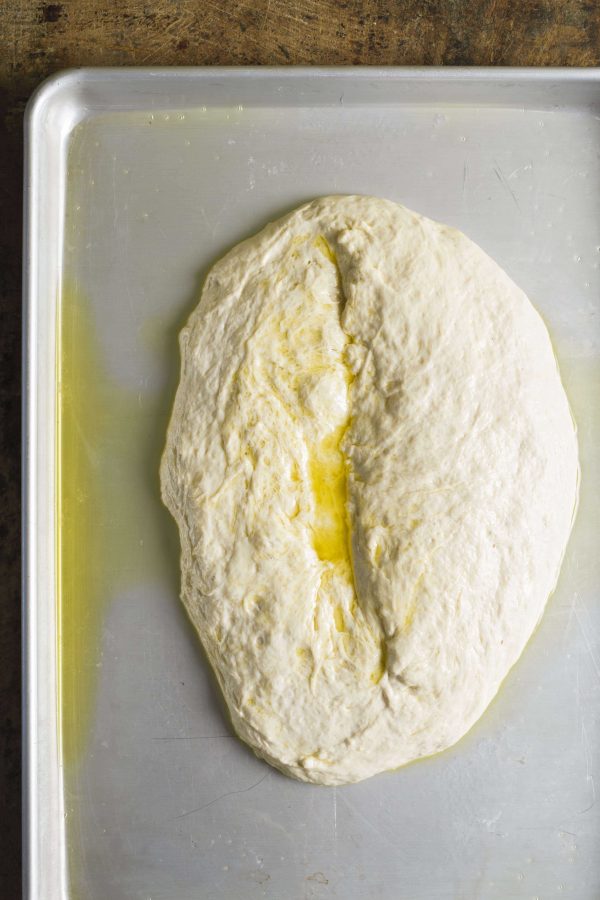
1. Pour the dough onto the prepared baking sheet and let rest for 20 minutes.
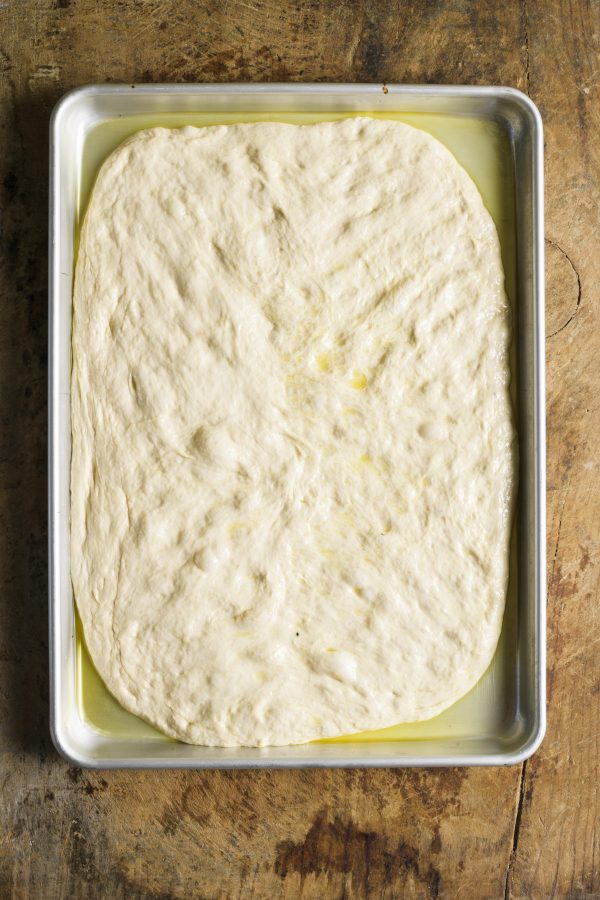
2. Using well-oiled fingers, push the dough from the center toward the corners—be gentle.
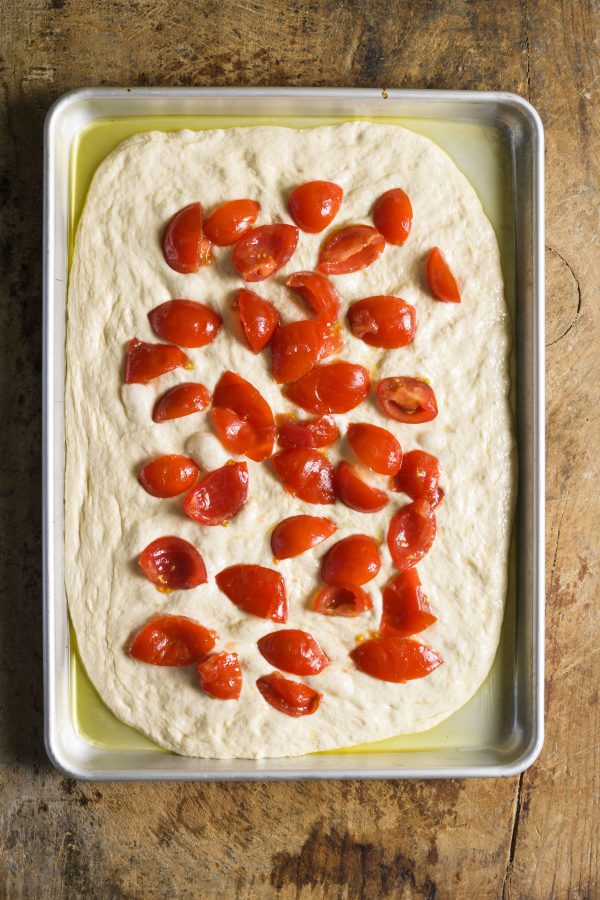
3. Top the dough evenly with tomatoes, leaving a narrow border, then let rest for 30 minutes.
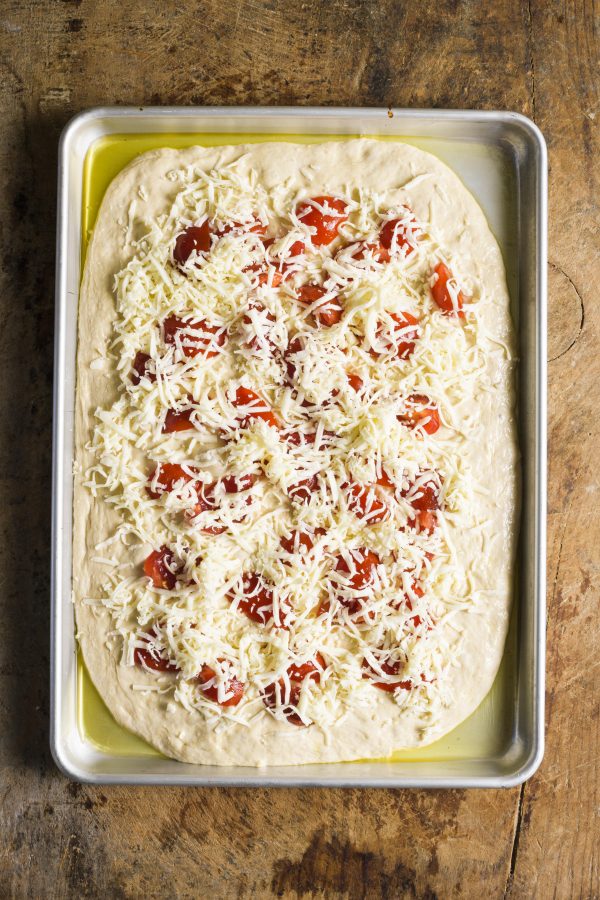
4. Add any additional toppings to the pizza, then sprinkle the cheese evenly over the top.
But the real problem was the toppings. Any liquid (tomato sauce, fresh mozzarella) ruined the rise and texture, and I lost the crispy top crust I was looking for. This reminded me of the tomato pies from da Michele—the fresh mozzarella di bufala turned out a crust that was soggy in the middle; everyone there eats pizza with a fork and knife! So, borrowing yet another trick from the focaccia playbook, I tried cherry or Campari tomatoes, sliced in half or quarters, lightly crushed with a potato masher. Then I strained out the juices; the resulting bits were dry, not wet. For cheese, a supermarket shredded whole-milk mozzarella is ideal—the fresh stuff tastes better but will ruin the crust. Oregano and salt round it off.
A few words of advice. First, I have found that it is essential to make sure that a pizza dough is fully rested and at 75°F before cooking. If the dough rises in a cool kitchen, the results will not be as good. Second, never stretch the dough from the sides and do not overstretch. It is better to have a smaller, airier, chewier pizza than one with flat, tough edges. (If the dough does not reach the sides of the pan, just relax—like the dough!) Finally, it is helpful to coat a silicone spatula with cooking spray before trying to remove the dough from the mixer. The dough is so wet that it will stick to everything.
Though this pizza-making process breaks all the rules (tons of water, tons of yeast, ridiculous rising time, and no stretching skills required), you get an amazing result: a crispy top and bottom, the latter reminiscent of a Chicago deep-dish pizza, and an airy, slightly chewy center. It may not look like an artisanal pizza—the top crust is shiny rather than charred matte—but it is exceptional nonetheless, a stress-free solution to homemade pizza, even if you are a better pizzaiolo than I am!
Related Recipes
September-October 2020

Sign up to receive texts
Successfully signed up to receive texts!
We'll only send our very best offers - Like a $15 store credit to start.
By entering your phone number and submitting this form, you consent to receive marketing text messages (such as promotion codes and cart reminders) from Christopher Kimball's Milk Street at the number provided, including messages sent by autodialer. Consent is not a condition of any purchase. Message and data rates may apply. Message frequency varies. You can unsubscribe at any time by replying STOP or clicking the unsubscribe link (where available) in one of our messages. View our Privacy Policy and Terms of Service.