To Scald or Not to Scald?
Some baking recipes call for scalded milk, some don’t. We’ve had many listeners ask why sometimes and not others. Does scalding milk really make a difference?
The term “scalding” refers to heating milk to just below the boiling point, typically to around 180°F. For the home cooks of yesteryear, this was a critical step to kill off potentially harmful pathogens—a common concern in the days before pasteurized milk. Today, this is less of an issue, and therefore it’s far less common to need to scald milk. But we learned that scalding milk still has a role in modern baking. Turns out, scalding also affects gluten development and how that gluten influences the final texture of baked goods. That’s because the whey proteins in milk can impact the gluten proteins in flour, ultimately weakening the elasticity of the dough. But the scalding process denatures the whey proteins, allowing for stronger gluten development that ensures a better crumb in breads and other baked goods. Unfortunately, working with hot milk can be tricky. If added to flour too quickly, the heated liquid tends to cause clumping, resulting in an unappealingly lumpy dough. But there is an easy solution: Just let the milk cool first, and then mix it with the flour. This works because once the whey protein is deactivated by scalding, it can no longer interact with the gluten, even when cooled.
Thinking Outside the Glass
Gabrielle LaTora, of Atlanta, Georgia, wondered about the best way to make use of unfinished bottles of wine.
Air can be the enemy of good wine. Once a bottle of wine is opened, oxidation can quickly ruin it. Luckily, wine can be used in many ways that don’t involve drinking. You can cook with it, of course. Be it a simple pan sauce (wine works wonders when it comes to deglazing pans) or a beef stew, countless dishes benefit from the complex flavors of wine. And if you won’t need it right away, excess wine is easily frozen in ice cube trays for use any time. Just make sure to do this before the wine oxidizes. Alternatively, you can simmer the wine with an equal amount of sugar to create a sweet and tangy syrup to drizzle over ice cream and pancakes or to incorporate into salad dressings. And if your leftover wine has already oxidized, you’re not entirely out of luck. You can turn it into vinegar. As wines oxidize, they eventually convert to acetic acid, or vinegar. To speed up the process, you’ll need a bit of motherly help—mother of vinegar, that is: the collection of oxygen-loving acetic acid bacteria that appears as a cloudy mass at the bottom of natural vinegars. This collection of bacteria is what helps transform alcohol into acetic acid. To make your own vinegar, fill a container with three parts red or white wine to one part “live” vinegar (i.e., vinegar plus a bit of the mother, such as many brands of cider vinegar). Then store it loosely covered—a jar or crock with a tea towel rubber-banded over the top is ideal, as the porous cloth keeps contaminants out while allowing oxygen in—at room temperature for several weeks. Red wine usually takes between one and two months to fully ferment, while white wine may take up to six months.
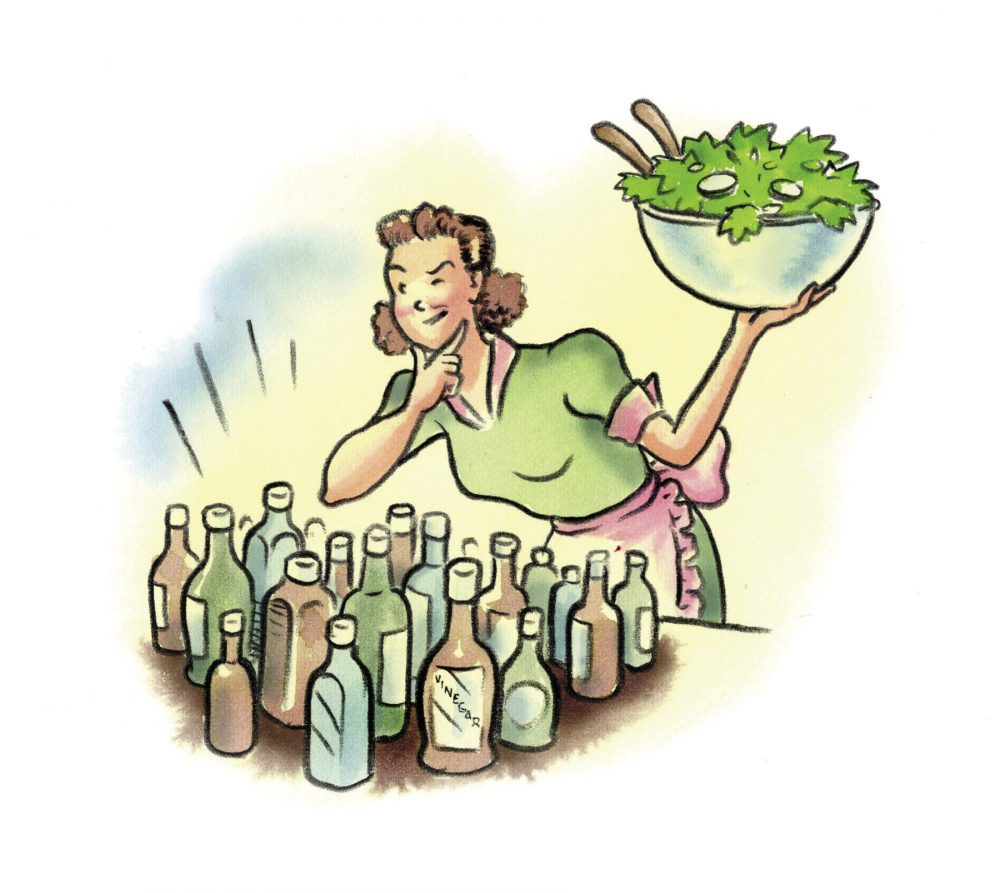
Best Dressed Salads
Bored with his go-to balsamic vinaigrette, Brad Lipton, of Washington, D.C., asked for simple solutions for upping his salad dressing game.
Dressings are an easy way to improvise bold, fresh flavor in otherwise basic salads. But there are a few factors to keep in mind. First, match your acid to your greens (and don’t be afraid to go beyond lettuce—in many parts of the world, handfuls of herbs such as basil, parsley and dill are used as the base of salads). Mild lettuces, such as butter lettuce, require less assertive flavors than bitter greens, such as radicchio. For mild greens, opt for mild vinegars, such as fruit-based or rice vinegar. For bitter greens, try something stronger, such as sherry vinegar blended with mustard. Second, don’t shy away from salt. Dressings taste brighter and fuller when generously salted. Start with a little, mix well, then taste and adjust until you are happy. Third, how you apply the dressing is as important as what’s in it. You want to be relatively sparing; too much liquid can swamp your ingredients. Whenever possible, dress your salad in a bowl large enough to allow for easy tossing, which ensures even coverage. And about that tossing: The best tool for the job often is your hands. Delicate herbs benefit from a delicate touch, and metal tongs or other implements can bruise the leaves. Finally, we don’t always emulsify our dressing before pouring it over the greens. Instead, we often like to add a few dashes of vinegar and oil directly to the greens, mix in additional seasonings (such as herby za’atar), then toss it all together until thoroughly combined.