Your email address is required to begin the subscription process. We will use it for customer service and other communications from Milk Street. You can unsubscribe from receiving our emails at any time.
German-Style Winter Squash Bread
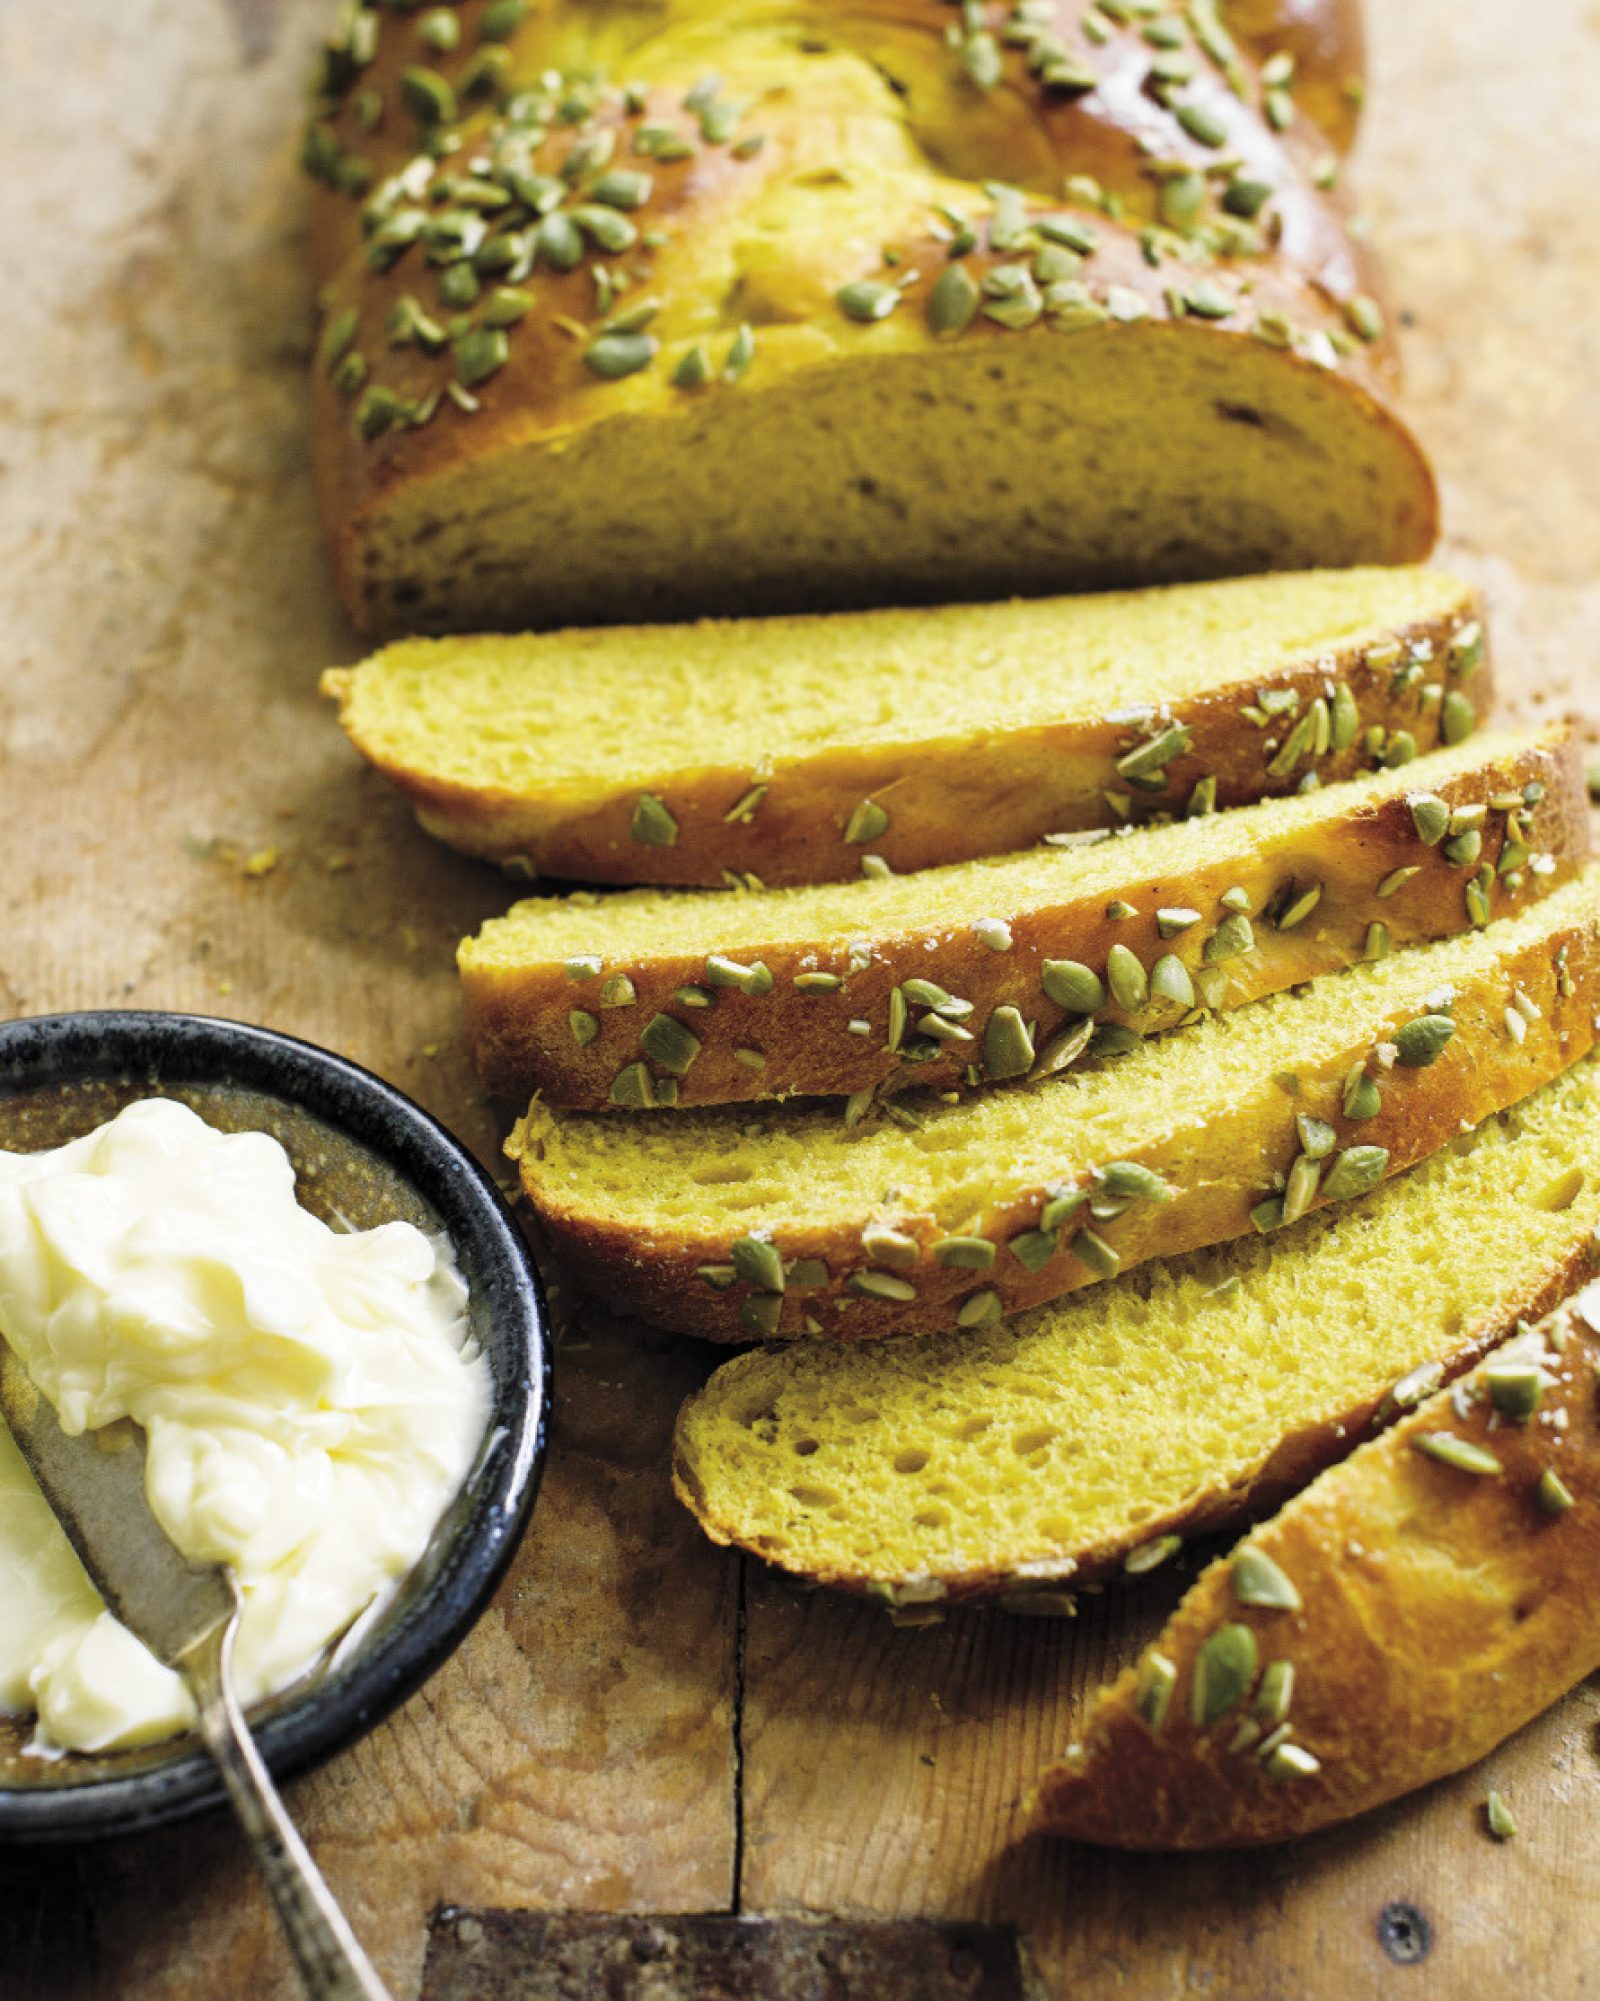
This inviting, impressive braided loaf gets its warm, golden hue from roasted butternut squash. The squash also gives the crumb a moistness, and the milk, eggs and butter lend a brioche-like richness. The German bread called Kürbisbrot (pumpkin bread, literally translated), in particular Luisa Weiss’ recipe from her book “Classic German Baking,” was our starting point for this autumnal loaf. Kürbisbrot is commonly shaped as a simple round loaf, but we took Weiss’ suggestion and made a special-occasion bread by forming the dough into a braid. We also added a touch of allspice for a warm, subtle fragrance and a sprinkle of pumpkin seeds just before baking. The dough is soft and sticky but also strong and elastic; it requires a sturdy stand mixer to develop a solid gluten structure and would be difficult to make this dough by hand. When you turn the dough out of the mixer bowl, it may seem too wet and batter-like to be shapeable, but with rising and refrigerating, it becomes workable. Store leftover bread at room temperature in an airtight container or zip-close bag for up to three days. It makes great toast once it begins to stale.
Makes one
1¾-pound loaf
Tip
Don’t be tempted to use canned squash instead of roasted fresh squash. Its flavor is more muted and its water content alters the moistness of the dough. Also, don’t forget to bring the butter to room temperature before starting the recipe, as it needs to be very soft in order to incorporate properly into the batter-like dough. Finally, don’t add too much more flour during kneading, before the butter is mixed in. If the dough pulls away cleanly from the sides of the bowl, it contains enough flour.
6 hours
45 minutes active, plus cooling
Ingredients
-
1½-2
pound butternut squash, halved lengthwise and seeded
-
¼
cup whole milk
Directions
-
01Heat the oven to 425°F with a rack in the middle position. Mist a rimmed baking sheet with cooking spray. Place the squash halves cut side down on the prepared baking sheet and roast until a skewer inserted through the neck of the squash meets no resistance, 35 to 40 minutes. Remove from the oven, turn the squash halves cut side up and set aside until cool enough to handle.
Pardon the interruption
You need to be a Milk Street Digital Member to see the full recipe
JOIN MILK STREET DIGITAL & PRINT
12 WEEKS FOR JUST $1
and get access to all of our recipes and articles online, as well as in print.
GET DIGITAL & PRINTReviews
January 29, 2023
German Winter Squash bread
I made this for the first time in 2023. It is light, tasty and definitely a bread to make over and over again. When it came out of the oven the aroma was so enticing that we sliced it immediately and let the butter melt into the golden slices. The bread never had time to cool before we had finished the loaf. Try it, you’ll like it.
January 23, 2023
Absolutely delicious
I made this last Sunday and it was incredibly delicious. It is light and airy with a very good flavor. This is a keeper.
December 16, 2022
Perfect holiday bread
Made this for the Thanksgiving holiday with my uncle and aunt, who spent a decade in Germany. They loved the flavor and texture of the bread and it turned out to be a favorite of my picky grandchildren.
November 2, 2022
Pretty needs more flavor for my taste buds
Just made this recipe because it sounded interesting with the butternut squash. The bread itself was a great texture and color and braiding the bread was a great touch. I do like bolder flavored breads so the flavors were not as strong as I would have liked. For the next round, I am going to roast and pan sear the squash after it roasts for more caramelization before I mash it. Also, add more allspice(2x?) and use a different salt or more of the same salt. Can't wait!
March 4, 2024
Great Recipe!
I followed the recipe and this came out great! It was my first braided loaf and thanks to the great instructions both on the TV episode and in the recipe it came out looking and tasting great. Nice soft texture and light crumb.
My loaf was also flatter than I wanted. Beautiful, but not tall. In hindsight, I wish I had made the three ropes shorter and thicker. Taste was lovely but the texture was a bit dry--much like challah. Our family didn't devour it like I hoped/imaged, so we used the leftovers as wonderful French toast.
Become A Subscriber To Rate and Review All Our Recipes.
Please Log in or join today for $1.
What flour would you recommend to make this bread gluten free?