The stone facade of La Viña blends into the sand-colored old town of San Sebastián, a city in Spain’s Basque Country better known for flashy Michelin-starred restaurants than old-school classics. Step inside, however, and it’s clear this is not just any pintxo bar.
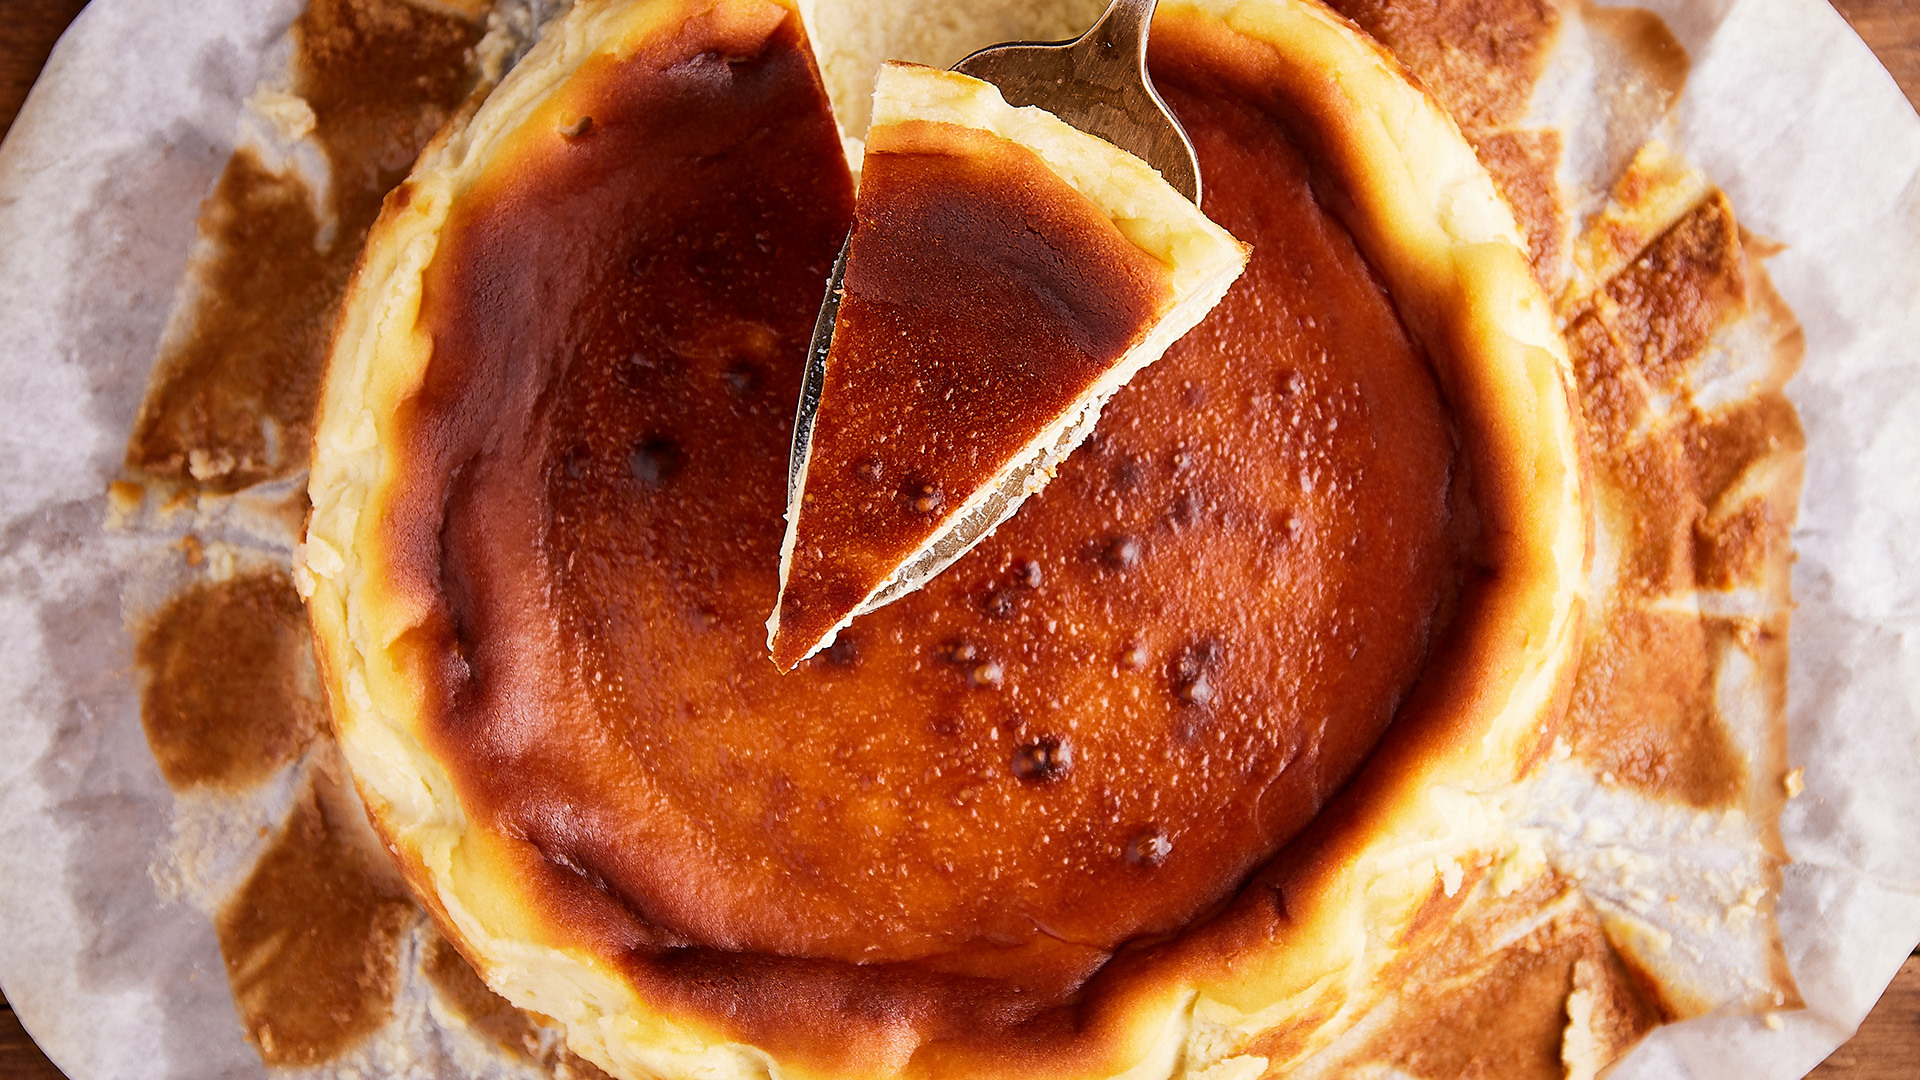
Wooden shelves and countertops are lined with cheesecakes, some still cooling in their baking tins with singed parchment ruffling over the top. Others, unwrapped, show off their mottled, nearly burnt tops and sunken centers in a way the uninitiated may see as a sign of a cheesecake gone wrong.
In fact, everything has gone right. The deeply dark, caramelized top—the product of a blazingly hot oven by cheesecake standards—hides a tart, creamy center so light and custardy it’s almost ethereal.
The deeply dark, caramelized top—the product of a blazingly hot oven by cheesecake standards—hides a tart, creamy center so light and custardy it’s almost ethereal.
La Viña’s bakers can hardly keep up, because this crustless cheesecake has gone global. Besides outright imitators from New York to New Zealand to New Delhi, there are Basque cheesecake-flavored mochi in Hong Kong, Basque-cheesecake chocolate-covered caramels in Japan, Basque cheesecake gelato in the Philippines.
Quite an accomplishment for a recipe that has just five ingredients. But it’s hardly a surprise to anyone who has tried it. Chef Santiago Rivera labored for two years on his days off to test dozens of recipes and combine them into the one that became his own. Then, just when the cake was catching on, he bucked most chefs’ secretive nature and gave the recipe away.
He simply mixes seven whole eggs with a kilo of softened cream cheese, about a pound of sugar, half a liter of heavy cream and a tablespoon of flour. The loose, pourable batter goes into a parchment-lined springform pan and bakes in a blisteringly hot oven until the top darkens deeply and the center comes out impossibly light, even jiggly. Without the water bath typical for most cheesecake recipes or even the need to make a crust, it sounds simple enough, right?
In the kitchen at Milk Street, it was. But when we started testing the recipe at home, our bakers came away with wildly different results. Turns out that knowing your oven and, more importantly, knowing how the type of pan you use will affect baking time, are the keys to success with this recipe.
As experienced bakers know, darker-colored pans absorb more thermal radiation and distribute heat more quickly than lighter-colored pans, which leads to variable cooking times. So the challenge was to get the nice surface browning that is the hallmark of this cake without overcooking the center—regardless of the type of pan.
But simply baking cakes in darker pans for less time in a cooler oven didn’t quite do the trick. We discovered that the temperature of the raw ingredients and even of the finished batter itself all affected the final results. Getting the creamy-smooth texture that is classic for this cake required letting the dairy and eggs come to room temperature before blending. But even that wasn’t enough.
Too often, a perfectly cooked interior meant an overcooked exterior, and vice versa. The solution—which we discovered after baking many cakes—turned out to be chilling the batter after mixing but before baking. This is because cold batter bakes more slowly, giving the exterior the time it needed to brown perfectly without the interior overcooking. Chilling for at least six hours—and up to 24—got us the results we wanted.
Rather than simply using visual cues, leaving it up to chance, we tested the cake’s doneness with a digital thermometer inserted through a crack into the center of the cake. It’s done when the temperature reaches 150°F, and even though it will still be wobbly coming out of the oven, it sets up as it cools for easy slicing.
With the cooking method settled, we dialed down the sugar a bit and added lemon zest for a floral, citrusy note that balances the cake’s richness. And for additional tanginess, we swapped out the heavy cream for a cup of crème fraîche. We also found that omitting some of the egg whites gave us creamier results, while the flour could be left out entirely.
After making dozens more cheesecakes in several different ovens, we were thrilled with the results. The nearly burnt, brûléed flavor on top complemented the pure, tangy creaminess of the center in a cake worthy of Michelin stars alone.
Basque-Style Cheesecake

1. Cut a 14- to 15-inch round of kitchen parchment. Line a 9-inch springform pan with the parchment, pushing it into the corners and against the sides of the pan, allowing it to form folds and pleats.
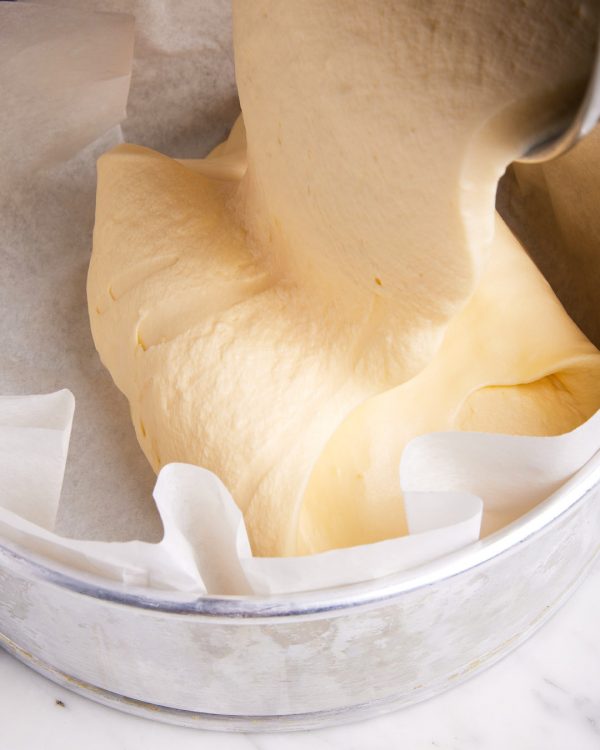
2. Once the oven is at temperature, prepare the cheesecake for baking. Remove the chilled batter from the refrigerator and pour it into the prepared pan; if needed, spread it in an even layer.
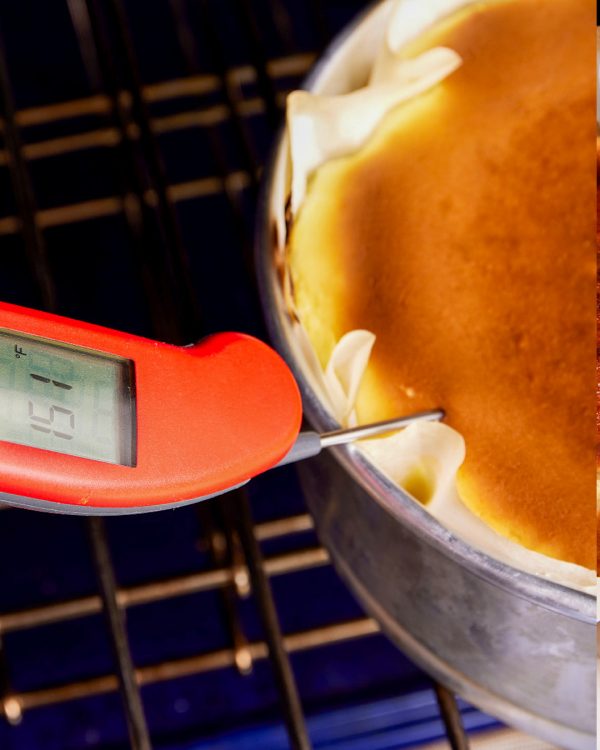
3. Bake until the cake is deeply browned and an instant thermometer inserted at the edge with the probe angled so the tip is at the center of the cake reaches 150°F to 155°F, 40 to 55 minutes.
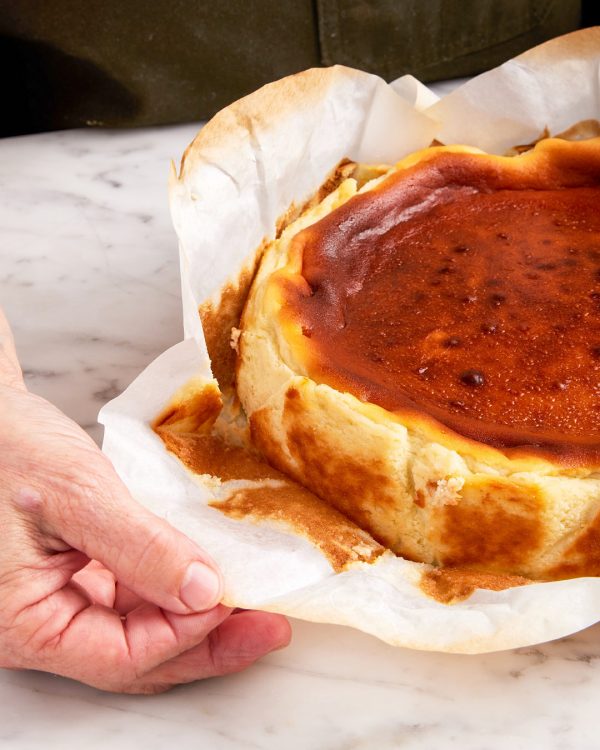
4. To serve, remove the sides of the springform pan, then set the cake, still on the springform base, on a platter. Gently pull the parchment away from the sides of the cake and cut the cake into slices.