What is spatchcocking?
“Spatchcock“ is a funny sounding word that means “get that backbone outta here.” Removing the spine allows you to flatten the turkey, so the meat is all roughly on the same plane, with the thighs slightly elevated. Instead of the delicate white meat sticking up above the walls of the roasting pan—where it gets blasted with heat—it can sink a down in there, with the legs and thighs acting as a shield. This lets you properly cook the drumsticks without drying out the breast, and it’s much faster, as you don’t have to deal with a large, lopsided piece of meat (or worse, a large, lopsided piece of meat stuffed with damp, airflow-impeding bread).
How to spatchcock a turkey
You can watch Chris break down the technique (and the bird) over on our Instagram, but it’s relatively simple.
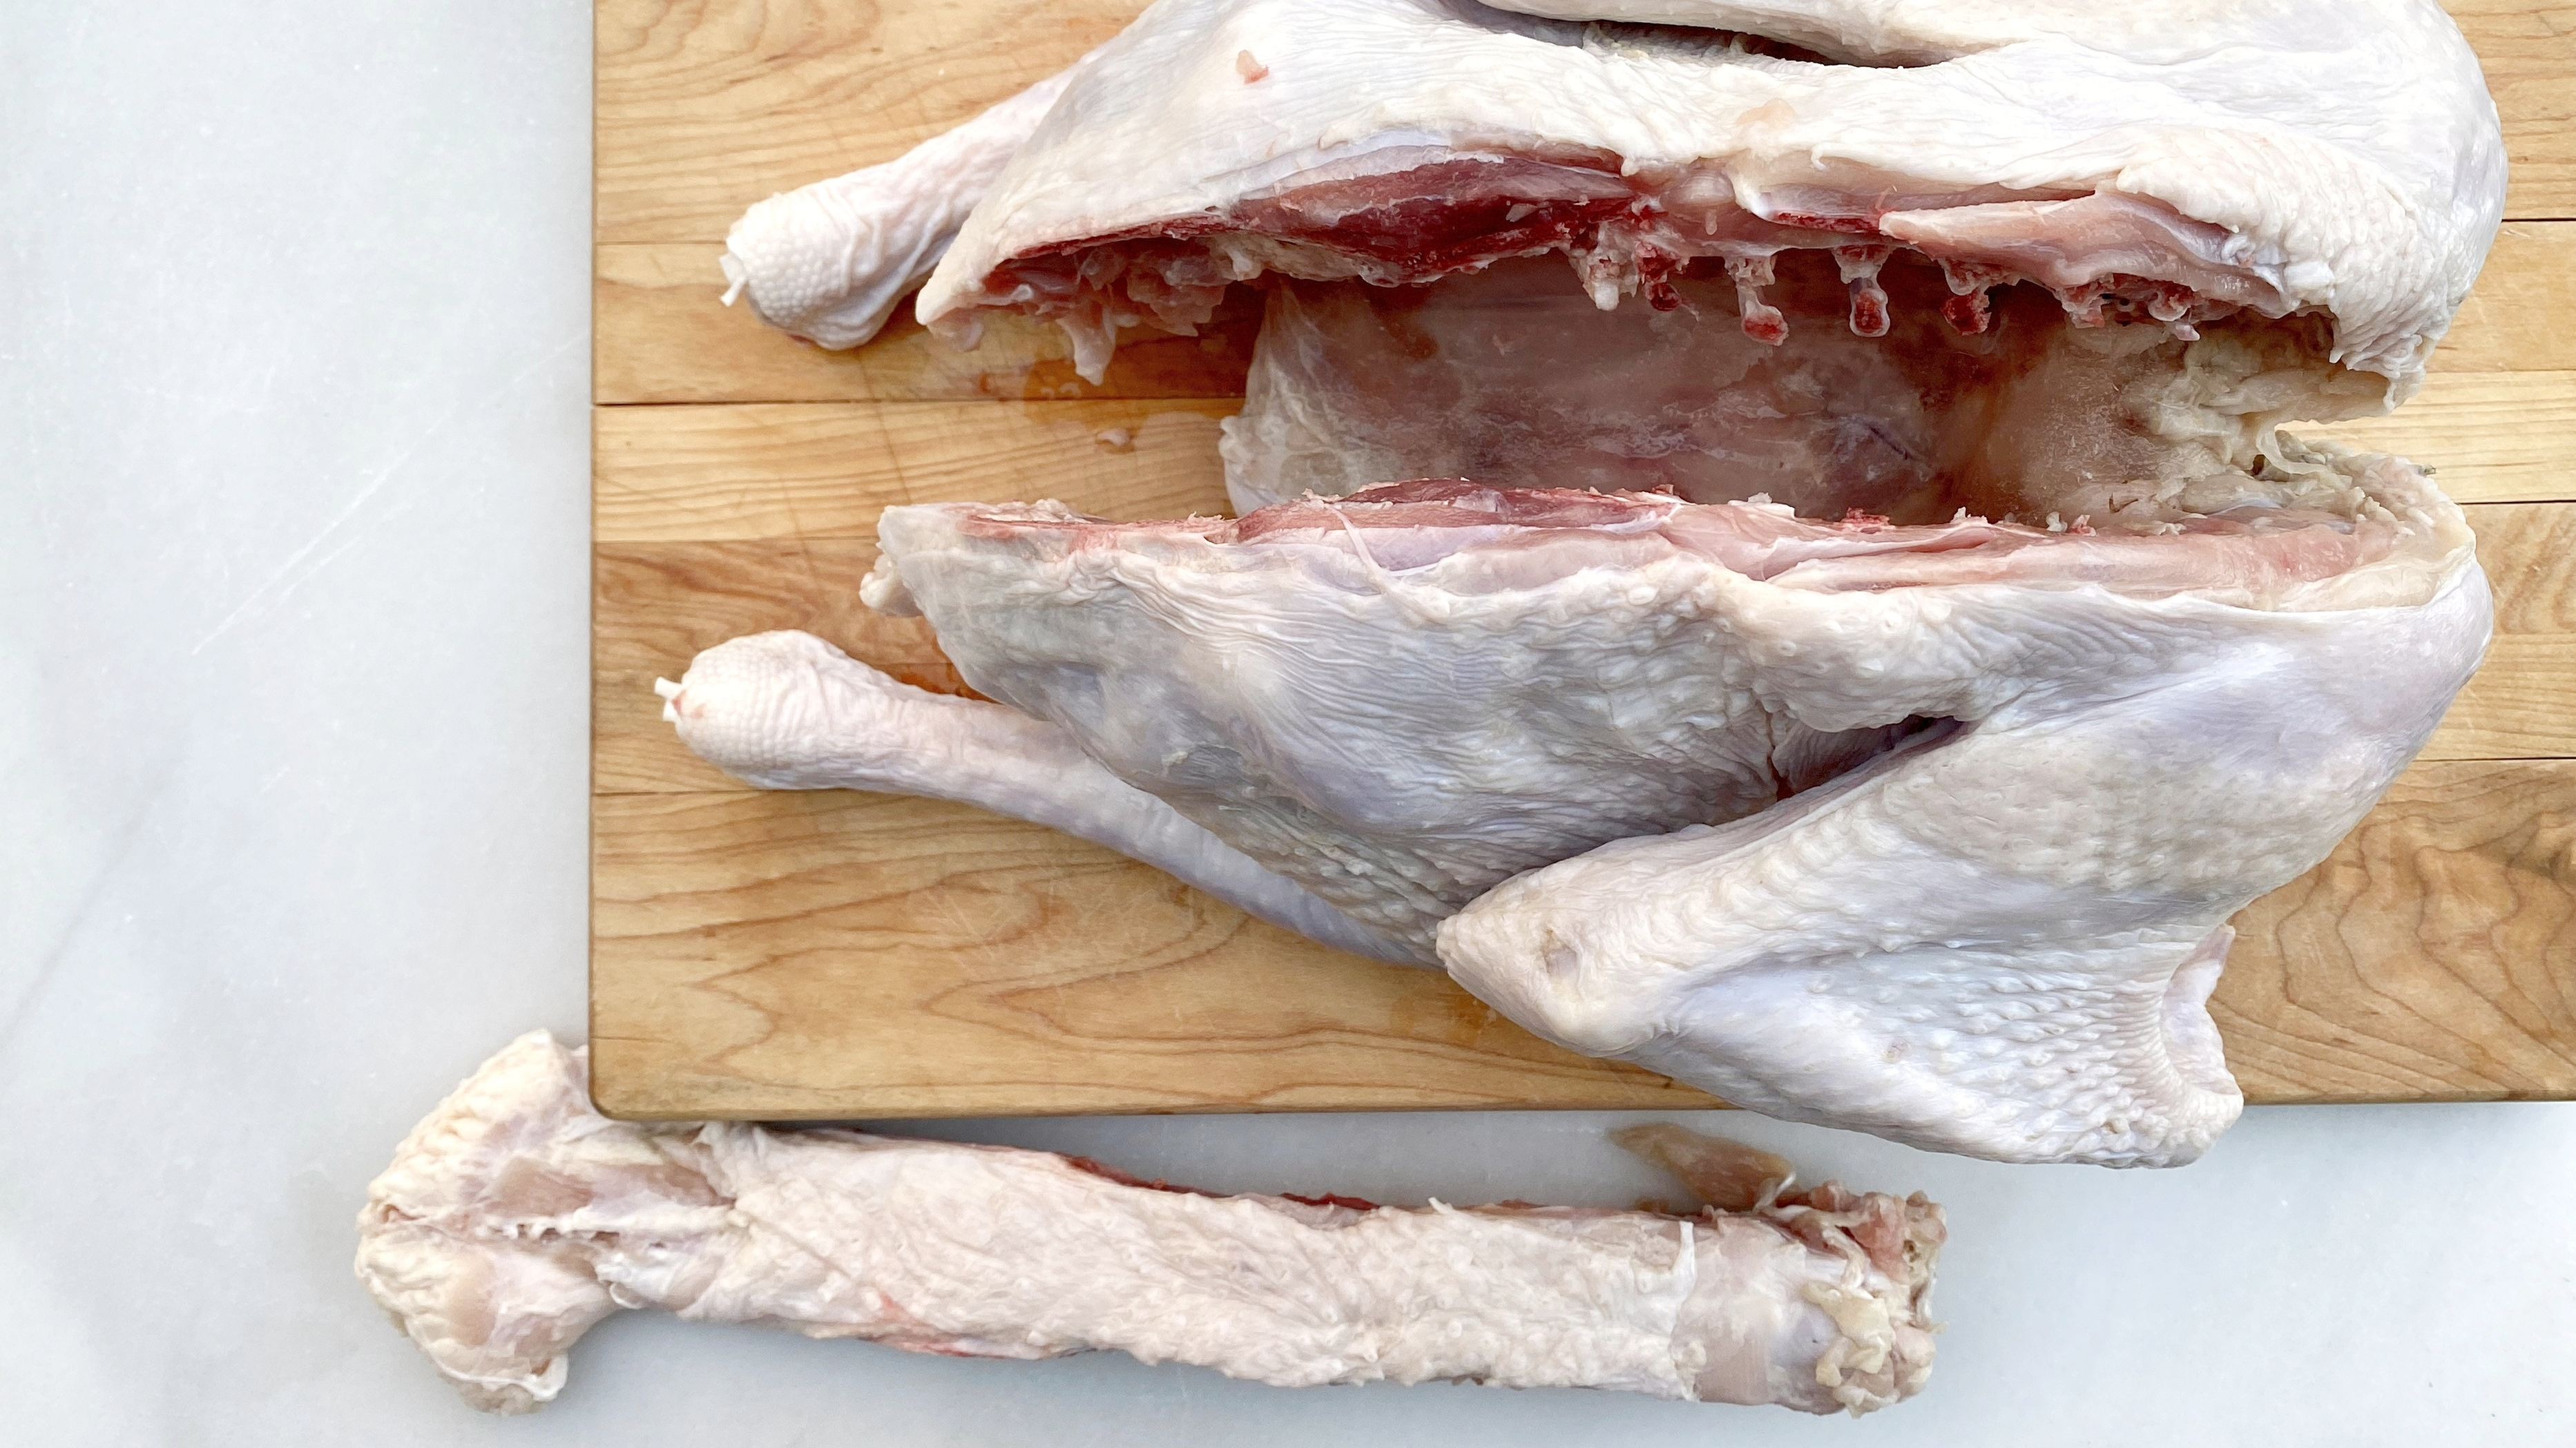
Set the bird on the cutting board, breast side down, with the turkey on its “knees.” Make sure you’re looking at the turkey’s back, not breast; I know many experienced home cooks who have accidentally cut through the breast bone during their first attempt at spatchcocking. An easy way to make sure you’re removing the right bone is to look for the pope’s nose—the fleshy piece at the base of the spine to which the tail feathers were previously attached. Start there, and you won’t miss.
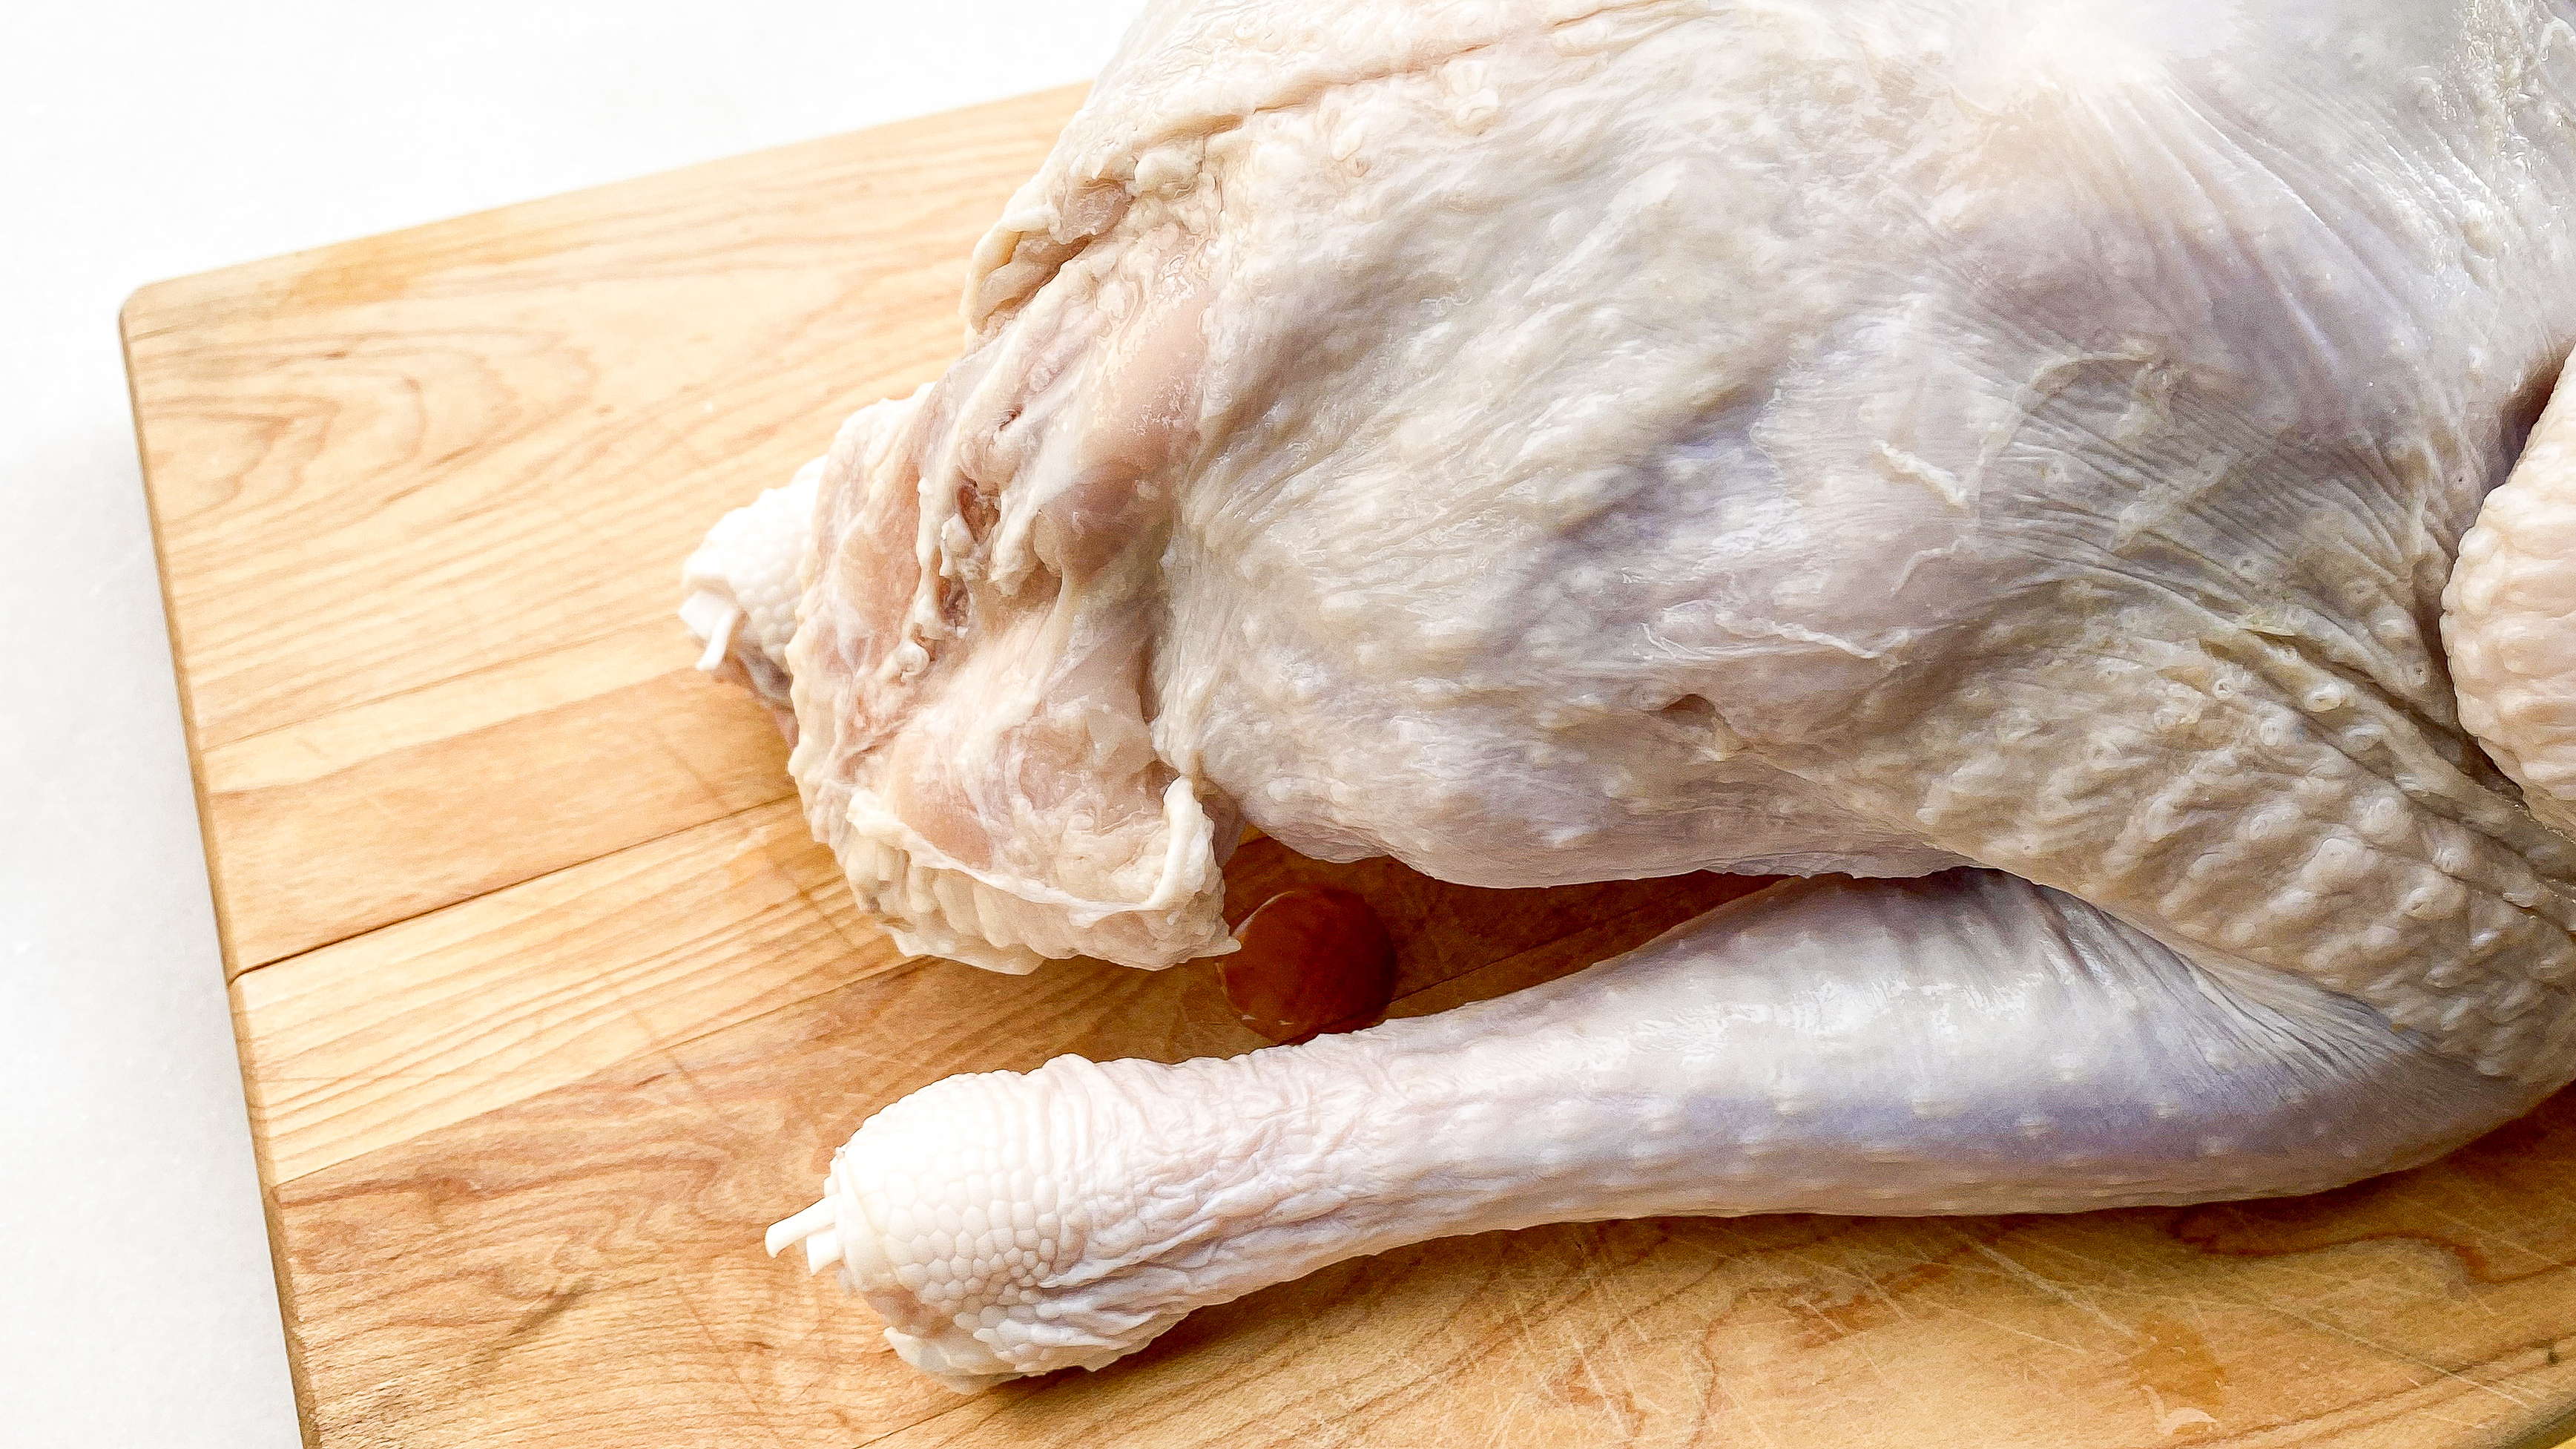
Once the bird is settled, grab some poultry shears, and remove the spine by cutting along both sides of it, starting at the pope’s nose and working all the way to the top of cavity. This will take a little hand strength, as you are literally cutting through bone, so be patient. And don’t be alarmed by any crunching sounds—that’s the bones, and it’s your job to cut through them.
Gradually work your way up one side of spine, little by little, then repeat on the other side and pull the back bone free. Do not toss this piece of fowl. Do what Chris does, and make gravy (more on how to do that below).
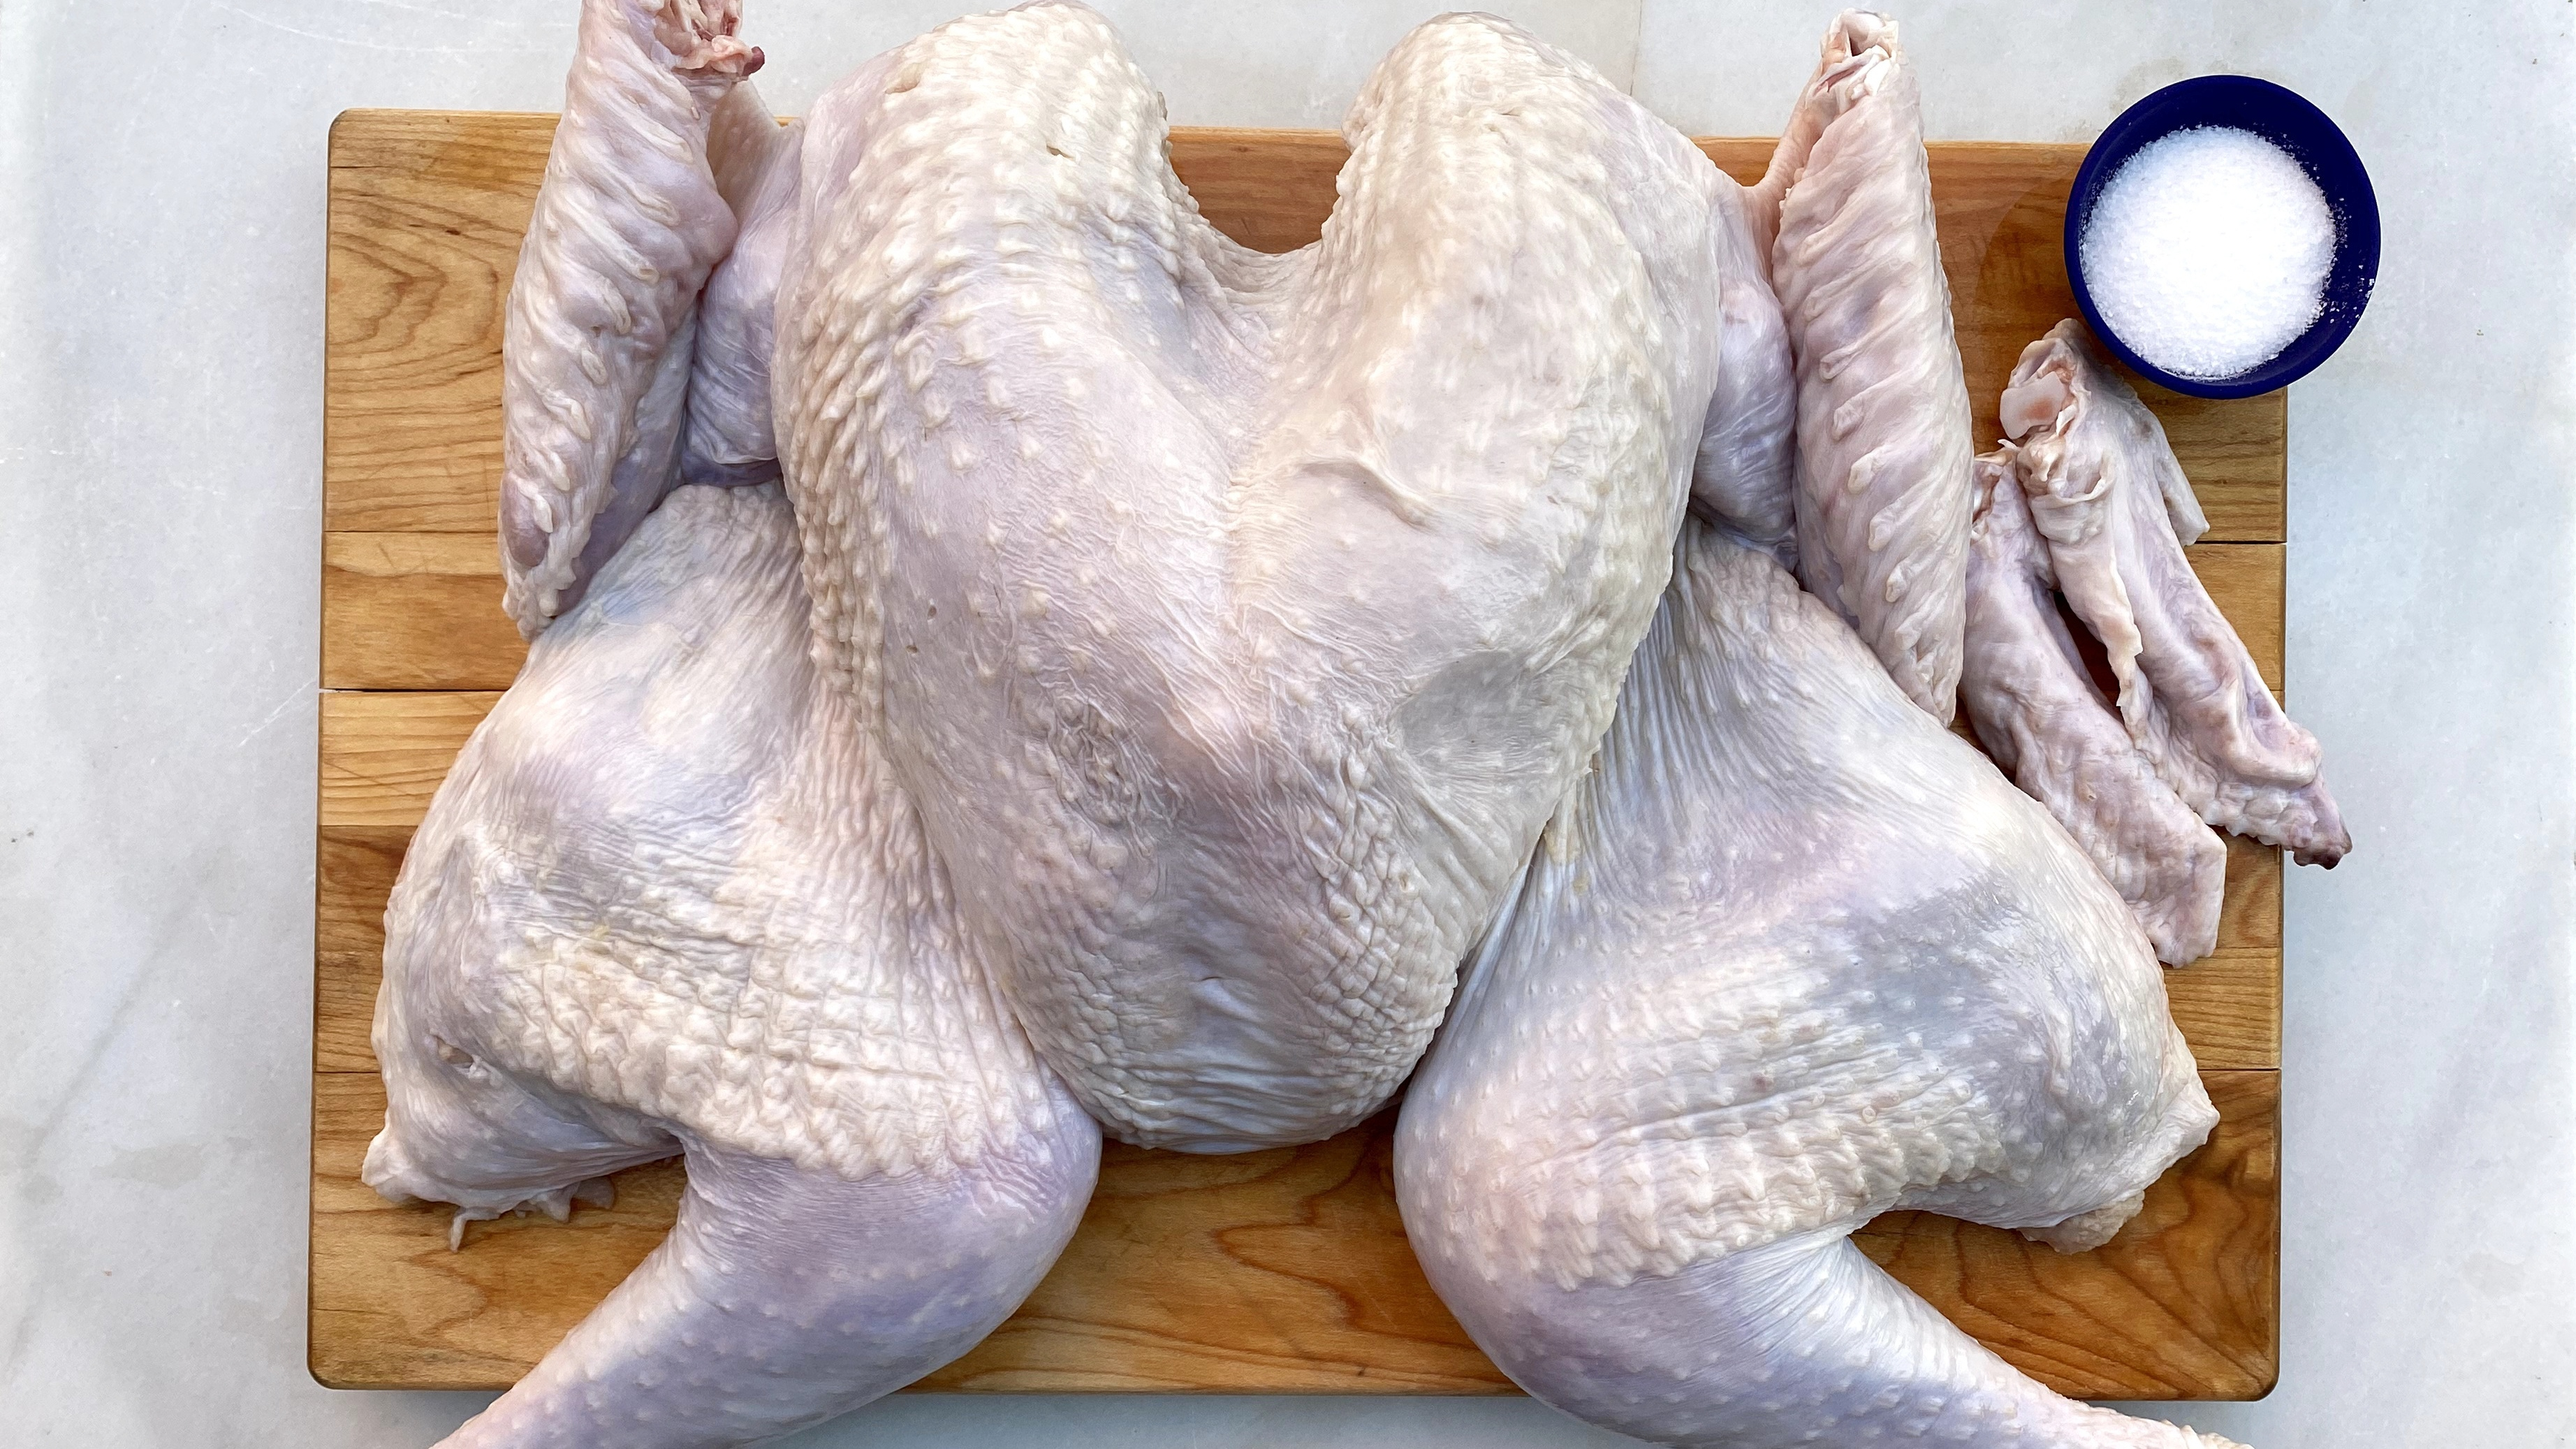
The hardest part of spatchcocking is now over. Now it’s time to work out any pent up holiday frustrations. Reach down into the carcass (where the spine used to be), and spread the two halves of the ribcage apart. Press down, hard on both sides to flatten the bird as much as possible. Pat the ribcage dry, and season with 1 1/2 teaspoons kosher salt.

Flip the turkey once more so it’s breast side up, and the sides are splayed out, not folded underneath. Using the heel of your dominant hand, with the other one on top for extra force, press down on the thickest part of the breast until you hear the wishbone crack, and the turkey flattens even further.
Remove the wing tips. Run your hand from the pointy tip of the wing to the first joint. Feel around for the joint with the tip of a sharp knife, or gently slice through the skin so you can get a good look at it. You are not cutting through bone; you are cutting between the joints. The tip should separate easily. Save the wing tips for your stock; wings are full of collagen. (If you feel you’ve done enough butchery for the day, you can also skip this step and tuck them under the bird.)
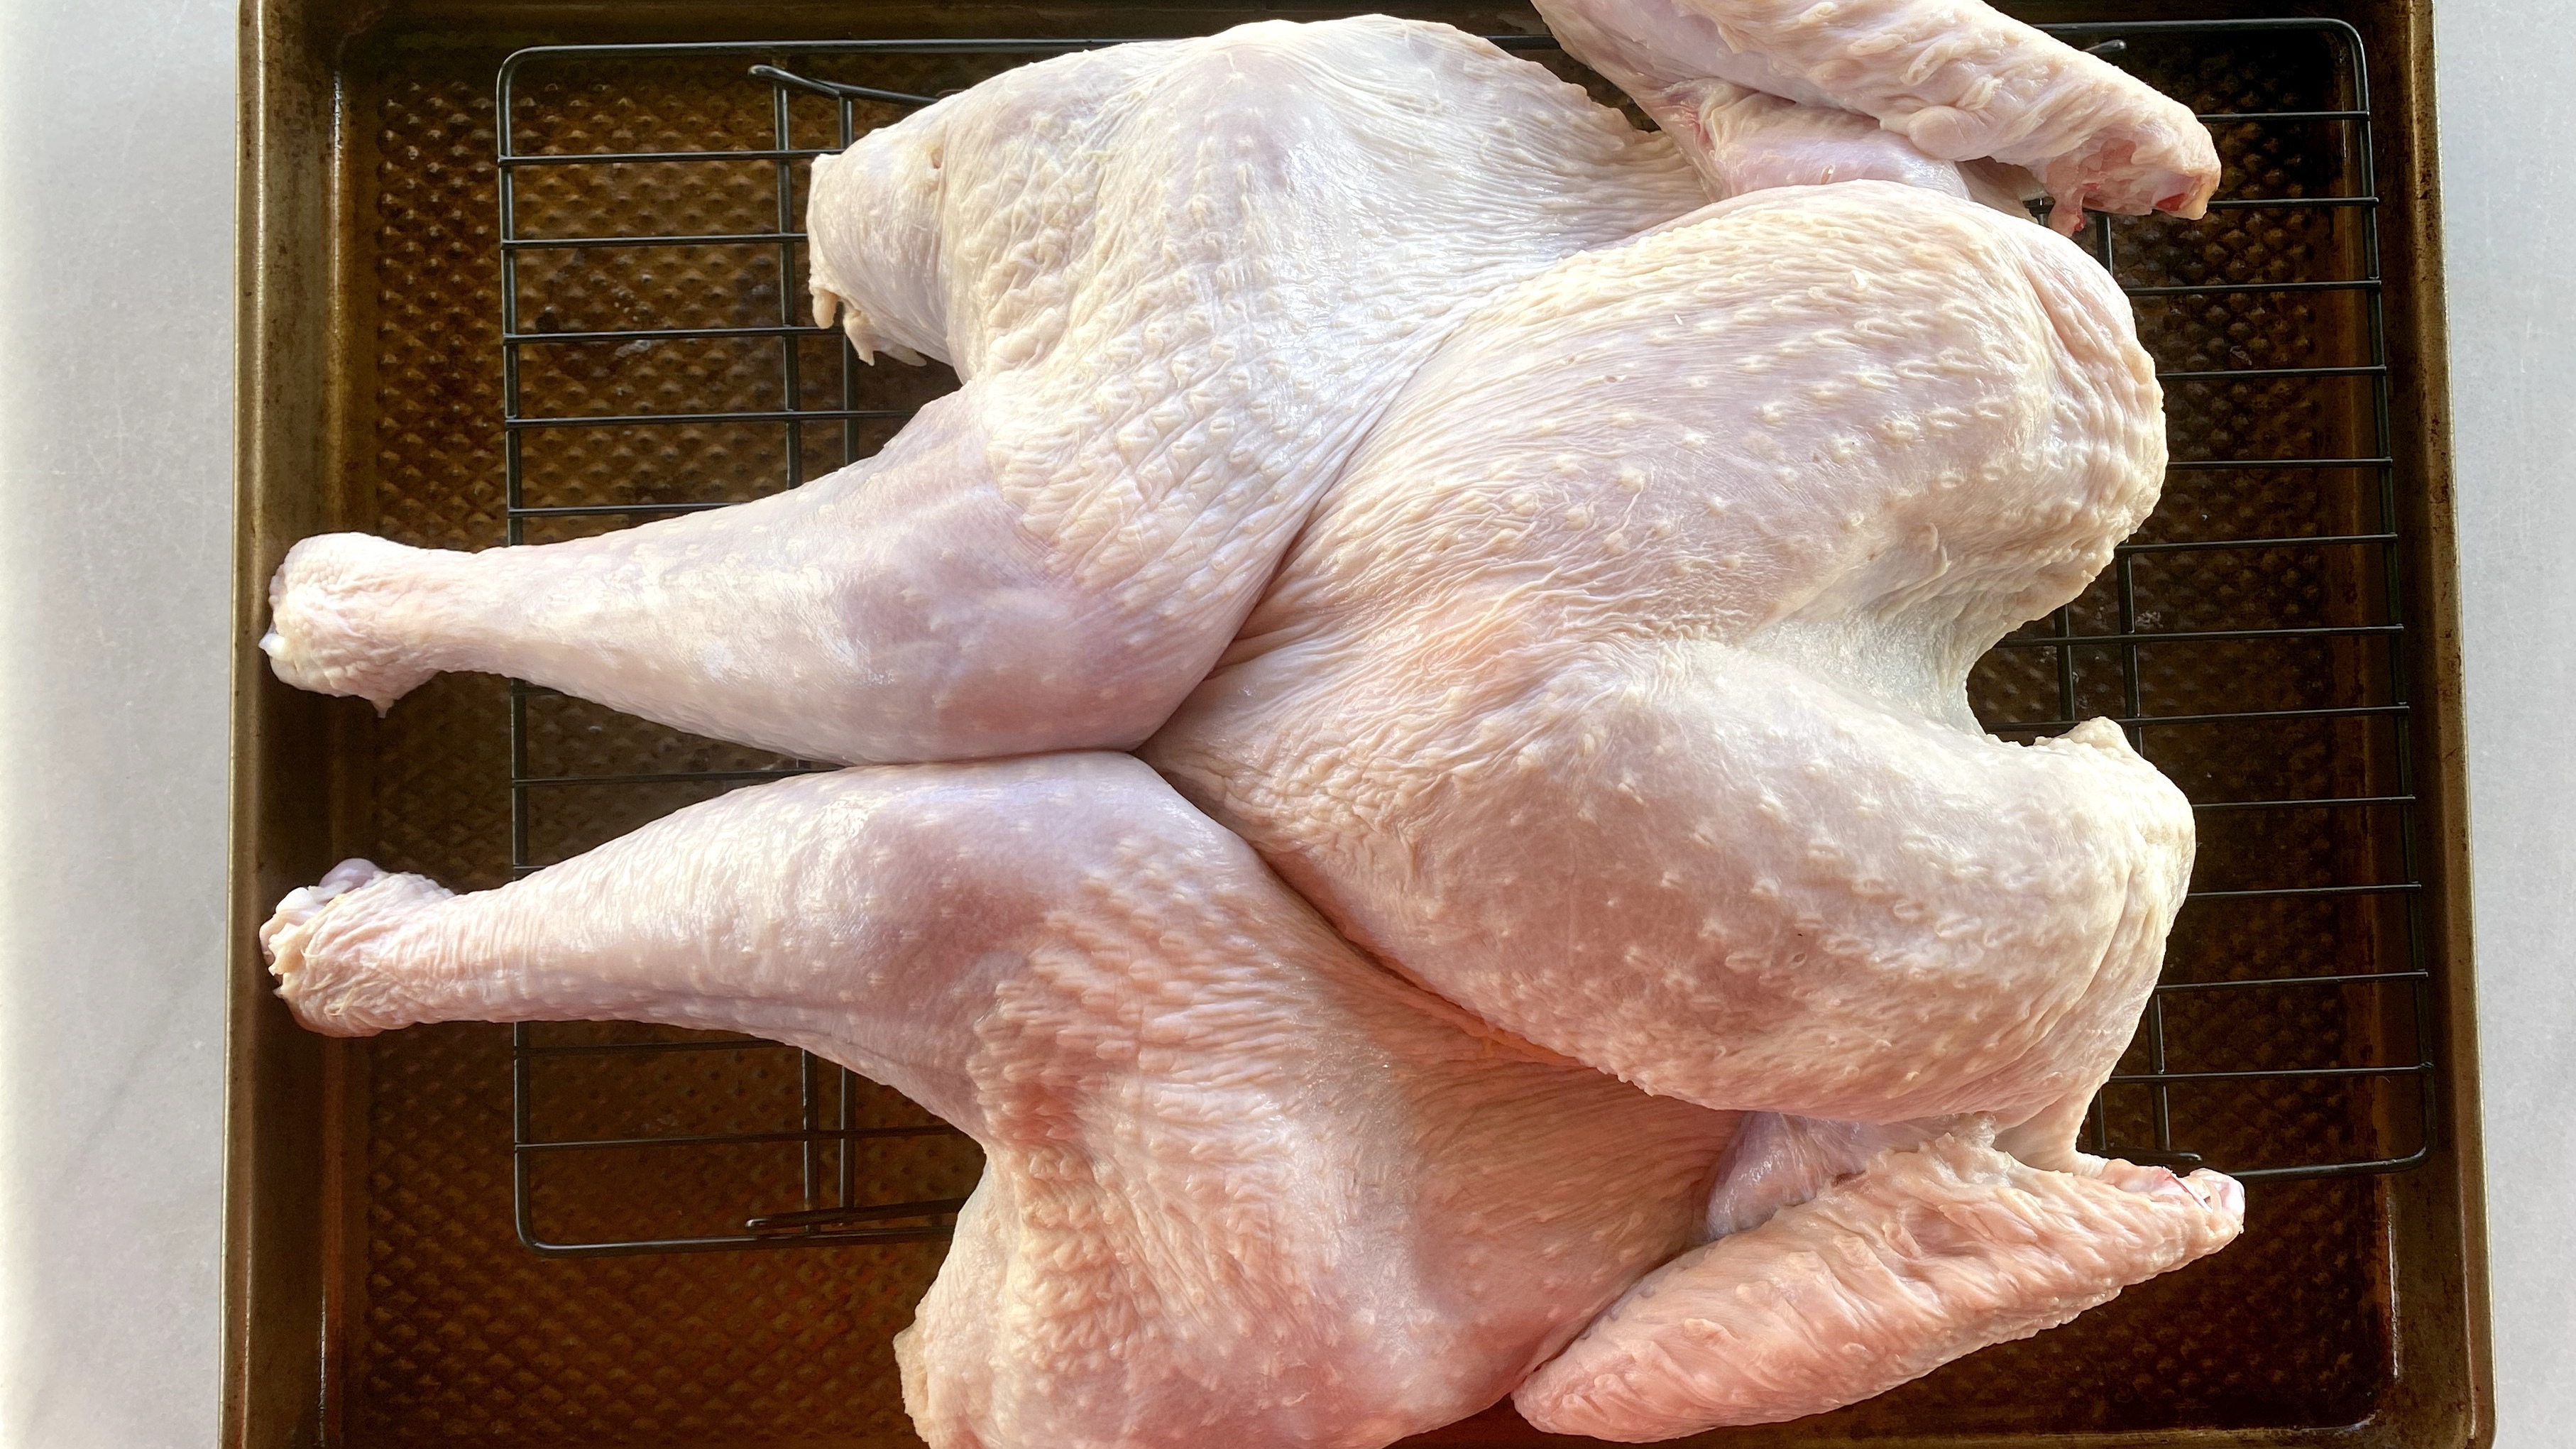
Pat the turkey dry, and season the skin of the bird all over with 1 1/2 tablespoons of kosher salt, then place it on a rimmed baking sheet, skin side up. Set the whole thing in the fridge, and let it hang out, uncovered, for at least two hours or up to 18. (Two is the bare minimum; let the salt do its thing overnight if you’re able.)
The benefits of dry brining
Salting—commonly referred to as “dry brining”—does a couple of things.
It gives your turkey a better, truer flavor. Instead of diluting the the meat with bay leaf-scented water, a healthy sprinkling of salt draws moisture out of the turkey. This liquid dissolves the salt, and the now-seasoned liquid makes its way back into the meat. This infuses the turkey with flavor while plumping it up with its own juices, without rendering it mushy with additional, unnecessary moisture.
Then, the cold, circulating air in the fridge dries out the surface, resulting in shiny, picture-perfect, well-browned crispy skin. It also takes up far less real estate than a bucket of traditional “wet” brine, which simplifies your life even further.
It really does cook in two hours
After dry brining overnight in the fridge, all that’s left to do is lay your turkey in the pan, season, and roast.
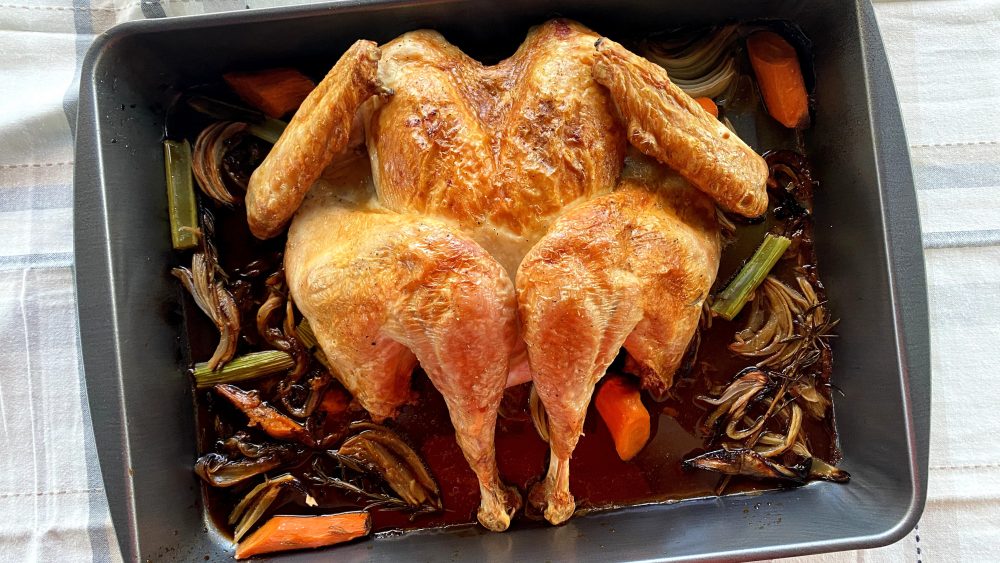
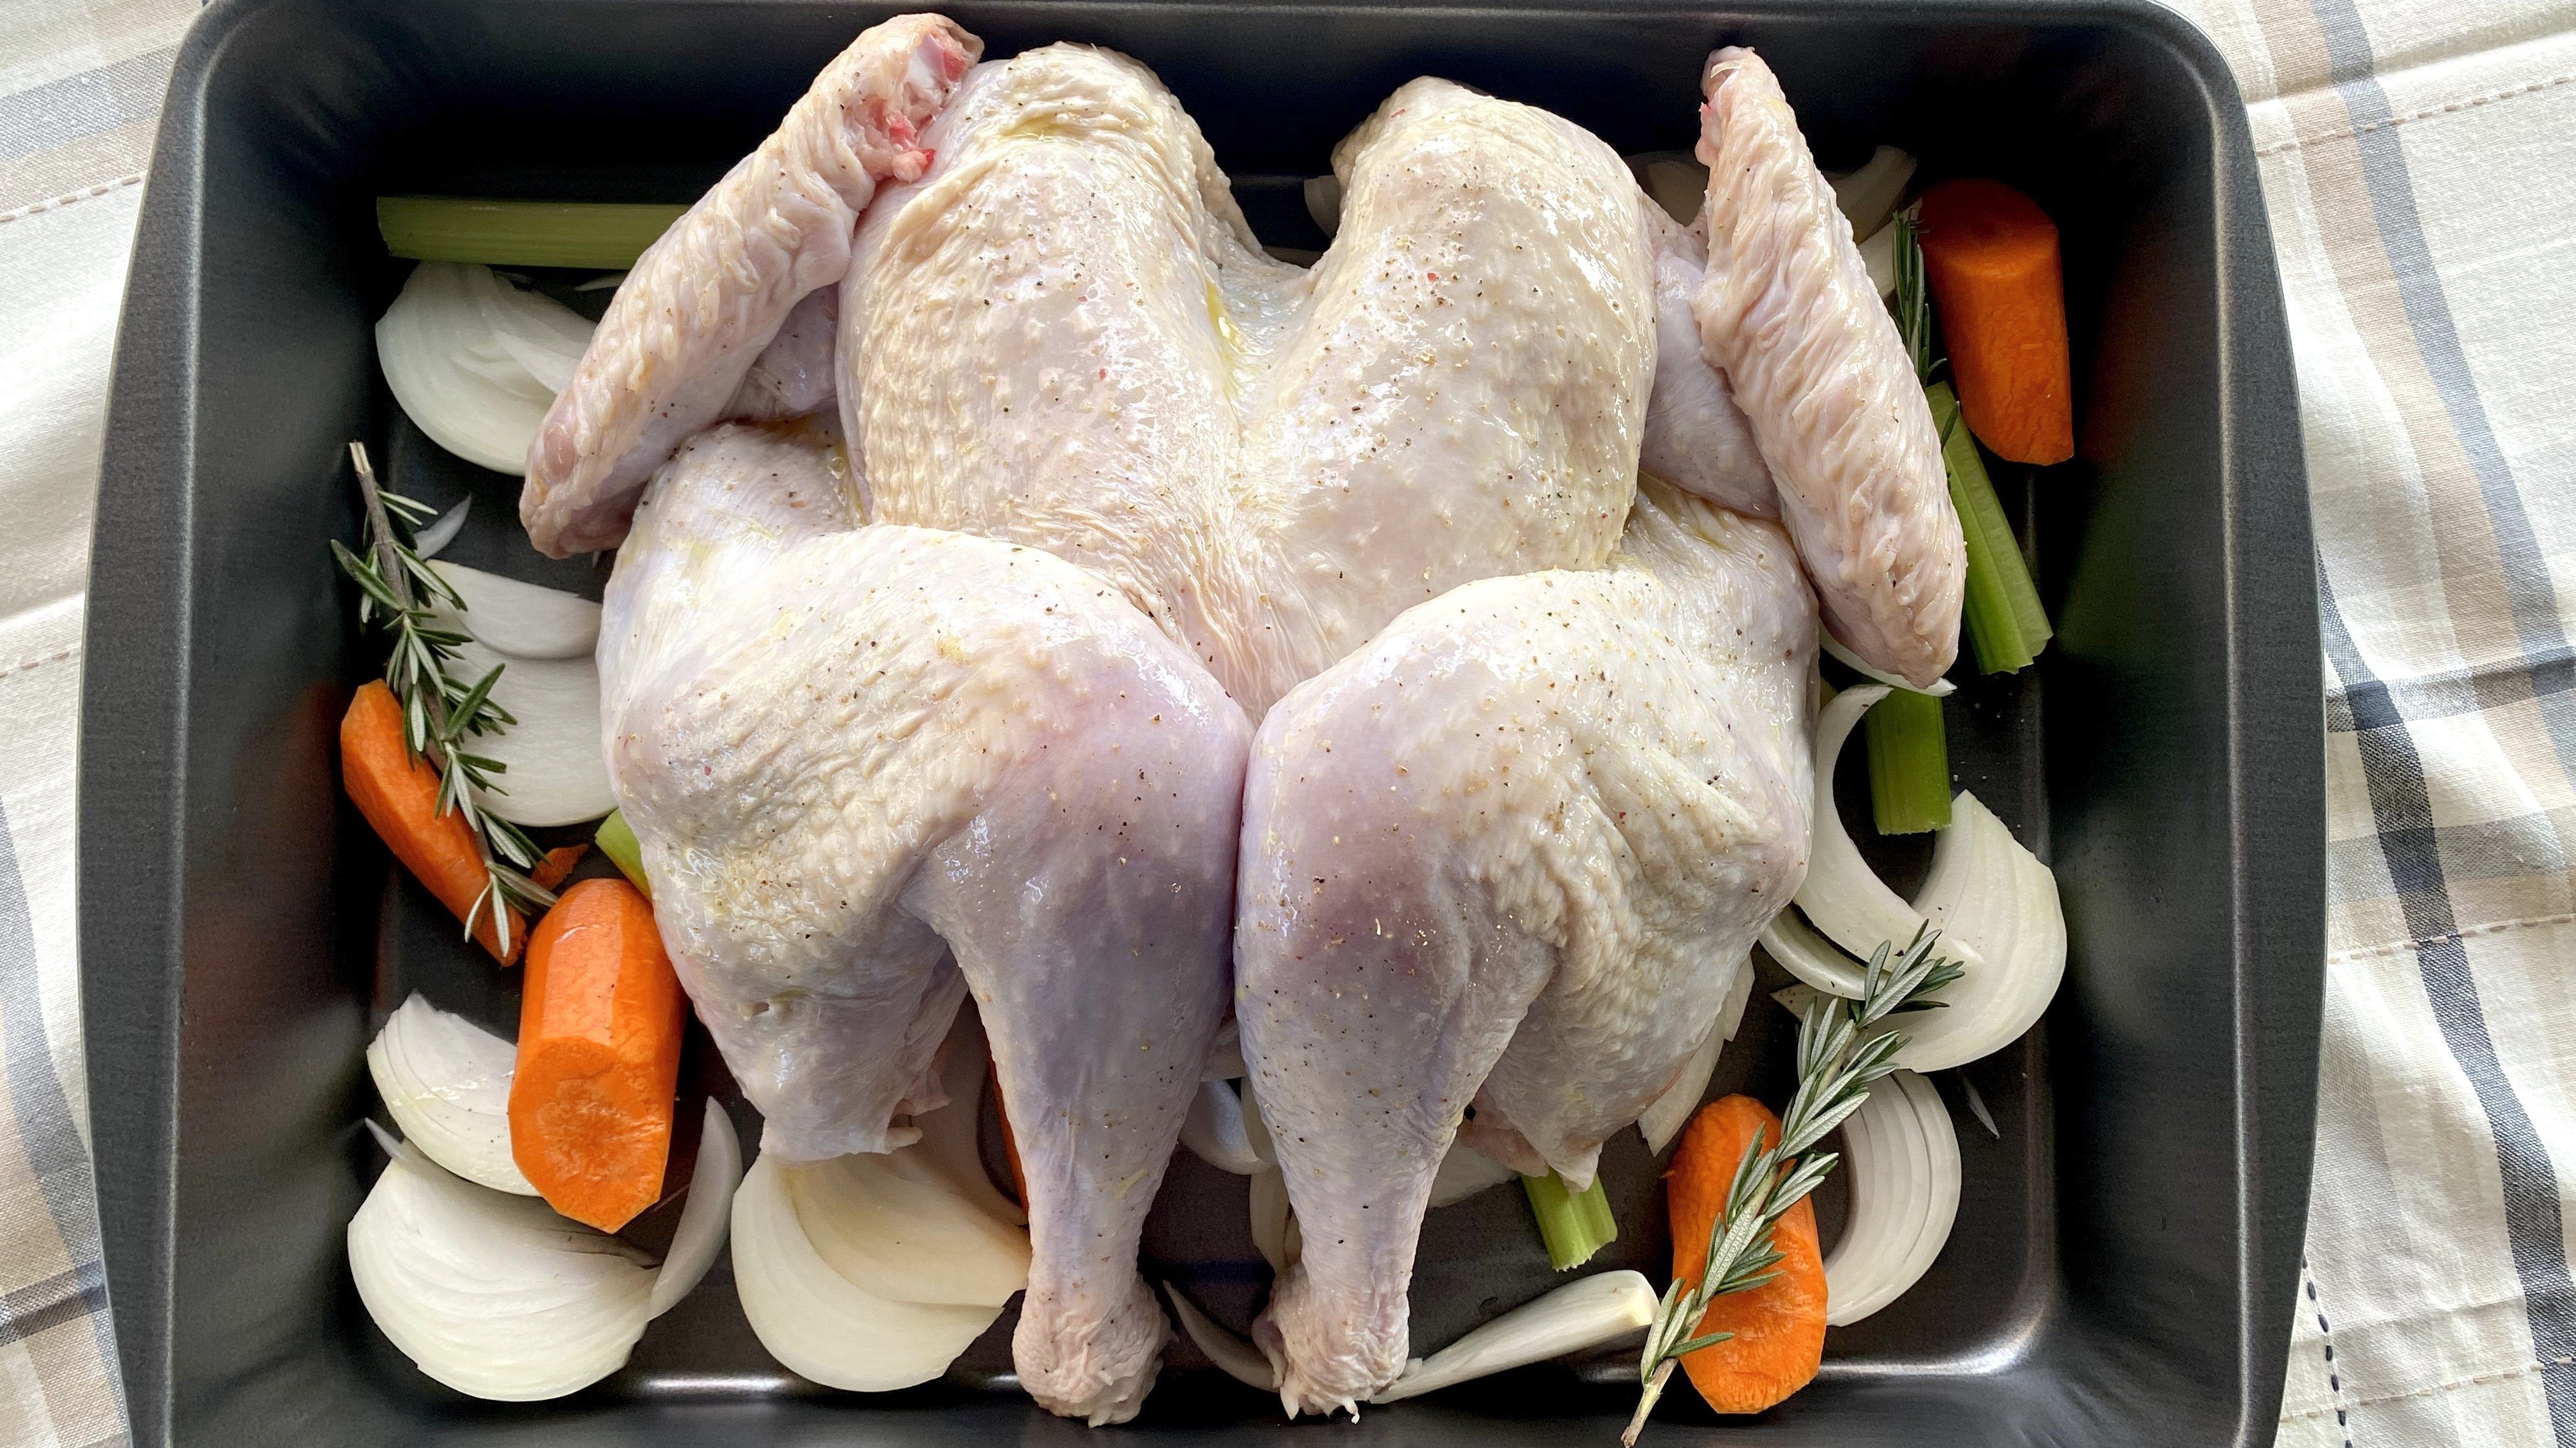
Heat the oven to 425℉ and position a rack as low as it will go in your oven (remove the other racks to give yourself more room). Chop up some onion, carrots, and celery, and grab a few sprigs of rosemary. Toss them together in the pan, and lay your bird down on a bed of produce.
Drizzle with grapeseed or olive oil, and massage it into the skin. Season with a little black pepper, then add a cup of water to the pan, around—not on top of—the turkey. (You don’t want to wash off any oil or seasoning.) Place the roasting pan on the bottom rack.
Roast for about two hours, rotating the pan halfway through, until the thickest part of breast reads 165℉ and the legs read at least 175℉ on an instant read digital thermometer. Chris recommends an hour and 45 minutes for a 12-pound bird and two hours for a 14-pounder, but keep in mind that ovens vary. My last spatchcocked turkey hit those temperatures an hour and a half in, so temp your bird after an hour, to see how rapidly things are progressing. (And keep an eye on the amount of liquid in the pan, as the vegetables can scorch if the water evaporates.)
The recipe is written for use in a conventional oven, so don’t use your convection setting unless you are intimately familiar with how it affects cook times. And never, ever, rely on the plastic pop-up “thermometer” that comes lodged in the body of your turkey. (Be an adult: Buy a digital thermometer.)
Once the turkey reaches its target temperature, let it rest for at least 20 minutes while you prepare the gravy. Chop up that back bone you removed earlier, simmer it in water until it takes on a translucent yellow hue, and combine the stock with the pan drippings (which you will have plenty of). You want a total of three to four cups of liquid. Season with salt to taste, then thicken with cornstarch or a roux. For cornstarch, start by making a slurry (to prevent the dreaded lumps). The standard rule is to mix in one tablespoon of starch with every cup of liquid, but Chris uses a bit less—maybe three tablespoons for four cups. If you prefer to thicken with flour, you can make a roux with one tablespoon each butter and flour per cup of liquid.
Now it’s time to wrangle the family and congratulate yourself on your excellent time and turkey management skills. The only downside to this method is the wishbone is pre-broken, but you’re replacing that silly tradition with a new one: the tradition of enjoying juicy, flavorful, golden turkey, without the wait.
Join the conversation on Facebook, Instagram, TikTok and Pinterest.
And if you're looking for more Milk Street, check out our livestream cooking classes with our favorite chefs, home cooks and friends for global recipes, cooking methods and more.